Categories
Games Design and Prototyping

Prototype 4: Rat Race

Concept and Set up Stage

Our fourth and final required assignment was to create a prototype of a platformer game akin to the likes of Super Mario franchise. At first I was intrigued by this opportunity to design my own explorable environment rather than being contained within a strict “arena” like my previous two environments.

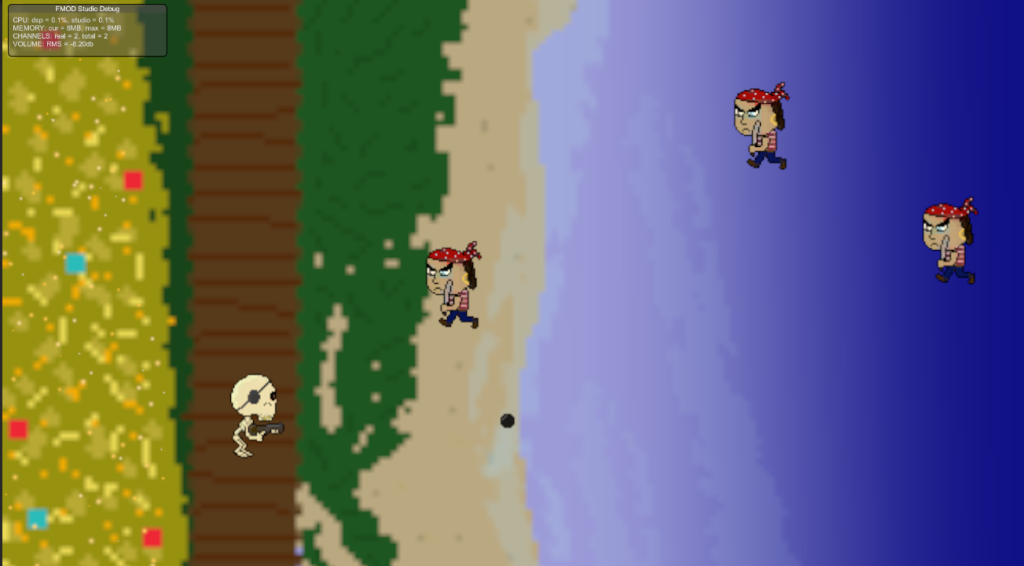
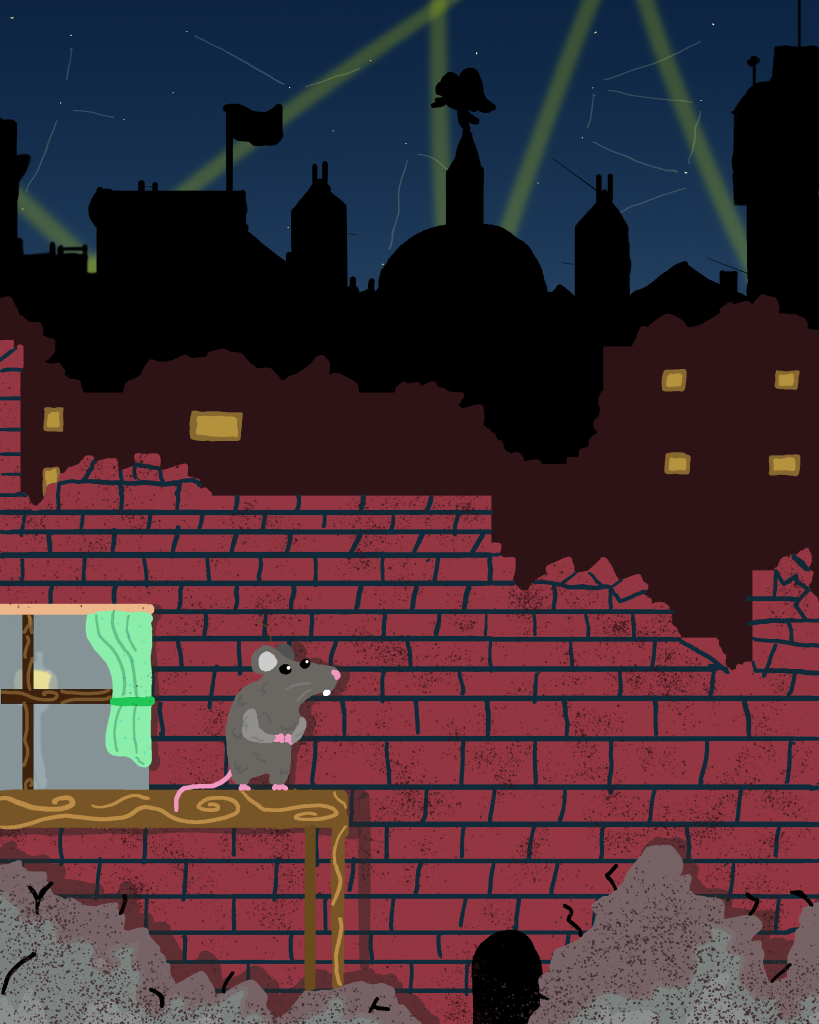
I found an old piece of concept art I had created for a different module on my course to be a fitting stimulus, and thus I based my work around this piece:

Original art made within adobe photoshop, inspired by the London blitz during WW2

This would once again be a 2D core project Built in Version of 2022.1.7f1 however this time upon creating the project, I would have to insert 3 additional windows into my scene: The Animation window ,used to create animations out of sprites, The Animator window, used for linking said animations, And finally the Tile Palette window, which i would use to create the platforms for my level.

Aside from that I would also be creating folders to store my script, sprites and prefabs alongside animations and tile folders.

Design

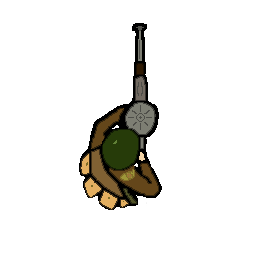
I started by creating a series of Assets for this project. In all I needed a playable character, enemies/hazards, tiles as to create the platforms and decoration for the environment.

Main Character
Cat Paw Enemy to jump on
Mouse Trap hazard to avoid
The Main Ground tile which would build the platforms for my level
Alternate ground for floating platforms
Cat arm decoration to go behind the Paw sprite
Wooden Table leg to be used behind the Floating platforms

After creating a myriad of assets to be used within my game, I then needed to tweak them for different use and animations. I reused the main Bricks to be used as a background by changing their hue and editing them to look old and broken walls like from my stimulus

This was used later as a background image
Mousehole tile I would later use as a goal

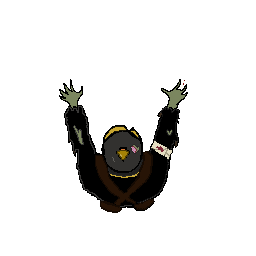
Following this I also edited my main character asset to have multiple frames of animation rather than appearing static like my previous projects. I had then grouped these frames together into one image and imported them into my sprite folder.

These were the initial 5 frames of animation present for my idle animation, these images also had a “facing left” variant to be used when my player wanted to go left.

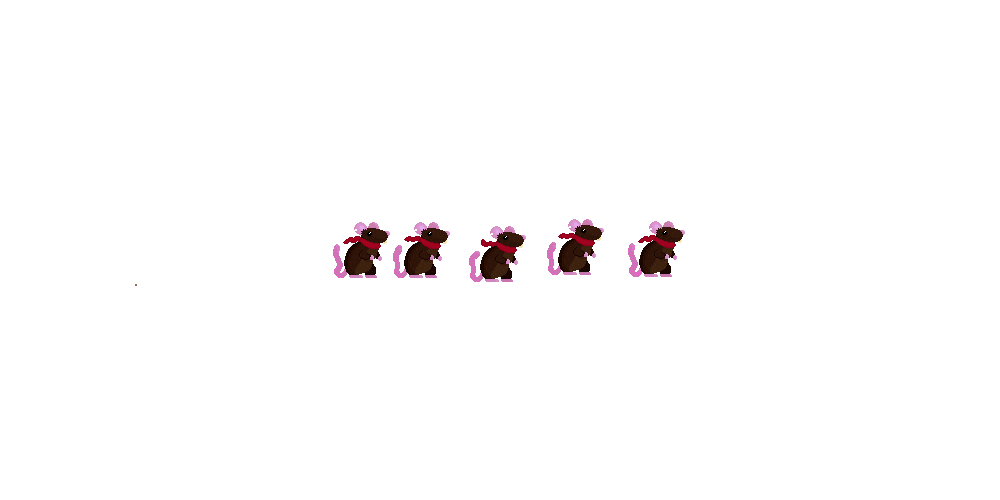
I then added these larger images within my scene in which unity then opened them up to be “sliced” this process automatically separated the different frames of the animation into an individual sprite, however I did need to clean these up by dragging the box tighter to the sprite as it wasn’t 100% accurate. Nevertheless, it then allowed me to save these image as animations.

The separated sprites of the “Jump Right” image after being sliced

Following this I could then drag these open these new animations in the Animation window.

Animation window depicting the dope sheet for “LookRightIdle” Animation

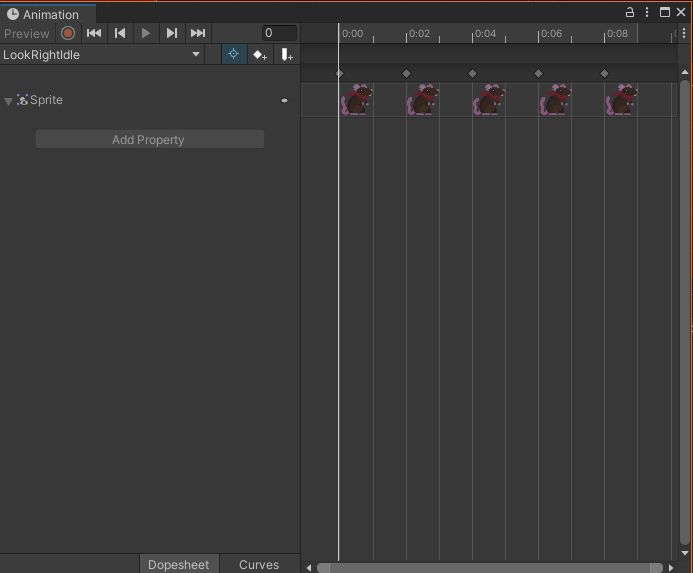
In this window I could open the dope sheet which allowed me to alter the length of animations, add a delay between frames as well as add or remove frames. When importing my looking right idle animation, I found it to play too quickly therefore I added a 0.01 second delay between each frame which allowed the animation to play much smoother.

“LookRightIdle” after being edited within the animation window.

Implementation

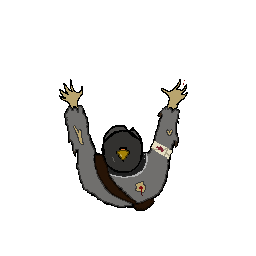
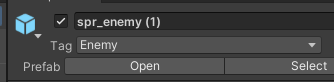
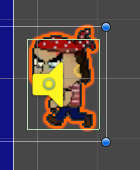
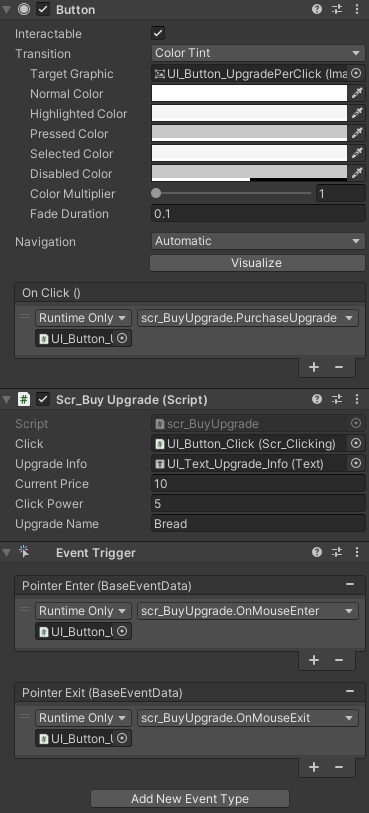
After adding the finished edited sprite within my scene I created a new prefab for my player. I also created two new prefabs for both my cat paw enemy and the mouse trap.

However at current there was nothing to in my game therefore I started by beginning to create a new 2D object, a tile map. I added the tile map into my Hierarchy and named it ground. Whilst I opened the tile map, unity automatically made it a child to a parent grid object. This grid would be used to paint on the tiles into my scene.

Tile Palette Window allowed me to select what tile to use

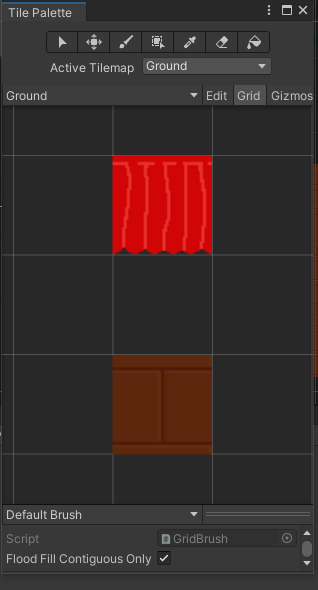
Following this I opened the Tile palette window and created a new palette, and named it ground. I the dragged my two tiles I had designed earlier into the palette and saved them into a Tile folder, from here I was free to paint onto the grid after selecting a tile and using the paintbrush tool atop the window. whilst creating my level design I also used the eraser tool to delete tiles and the paint bucket tool to fill in a larger area of tiles.

After setting up my Tile palette I then needed to add in some important components to my Tile map object. I added the Tile map renderer, so the palette would show. the Tile map collider and Composite collider 2D which were used together to create collision for the tiles, i connected these components by checking a box within the Tile map Collider “Used by composite” which made the collision within my scene a lot smoother.

Finally I added a Rigidbody 2D to add physics to the Tile map. I changed the body type to static as these objects will not be moving within my scene

Components added to the TileMap

After I had painted a rudimentary level layout I then needed to test it with my playable character. However before I could get my character moving I first had to open the animator to add transitions between the different animations.

Animator window links the different animations between one and other

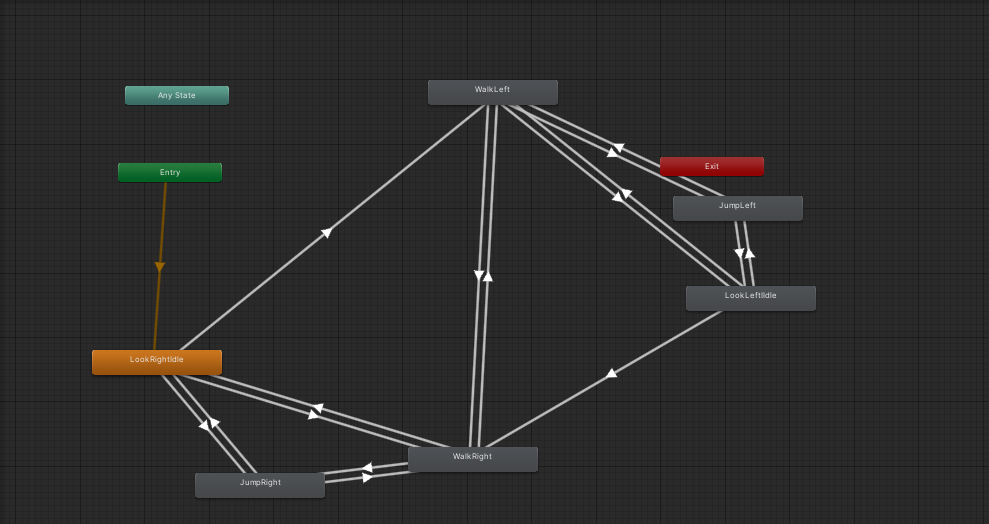
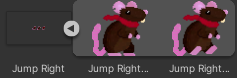
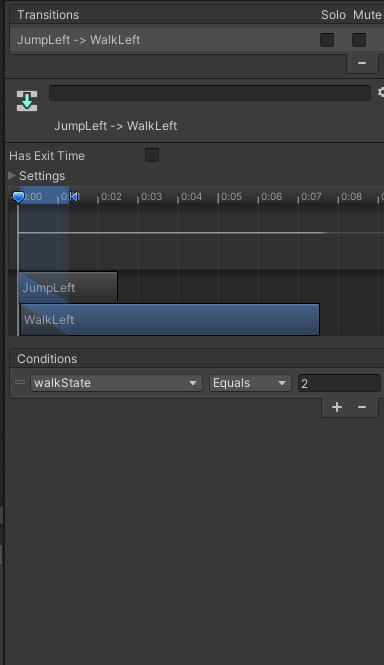
Once I had dragged all my animations into the Animator window I use the right click to begin making links between the differing animations so my character could transition between their walking jumping and idle animations fluidly. when creating a link between different states, i had to add conditions for when they could play like so:

I also decreased the time between transitions for a more fluid look during gameplay

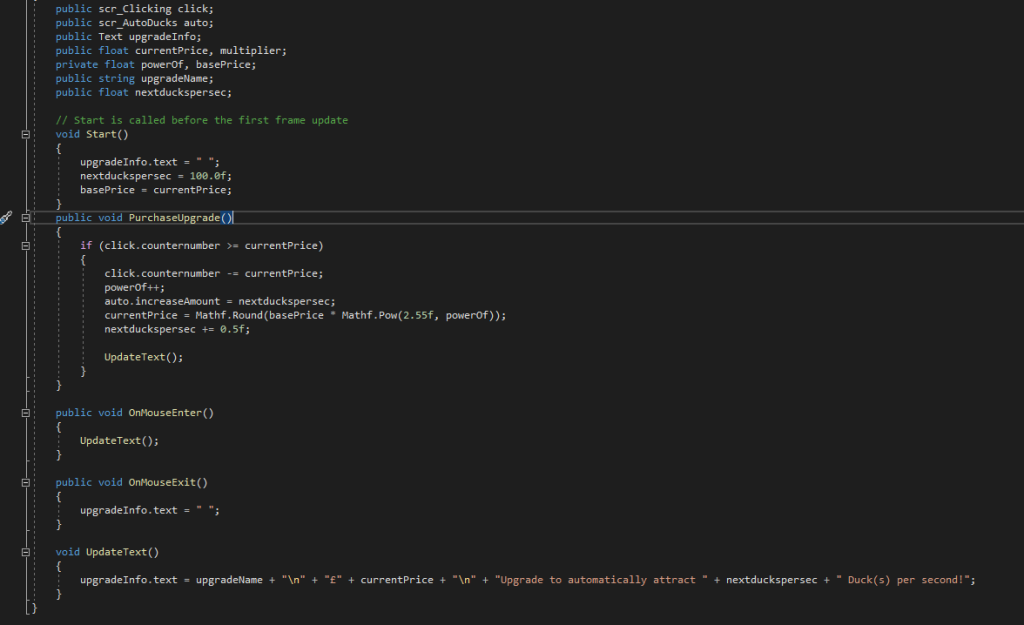
Following this I began work on my movement script for my player prefab so I could move around the level freely.

scrPlayerMovement

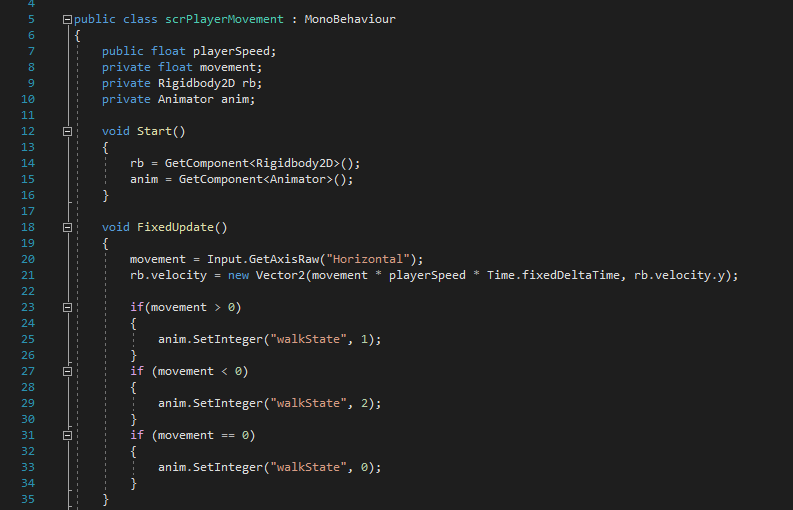
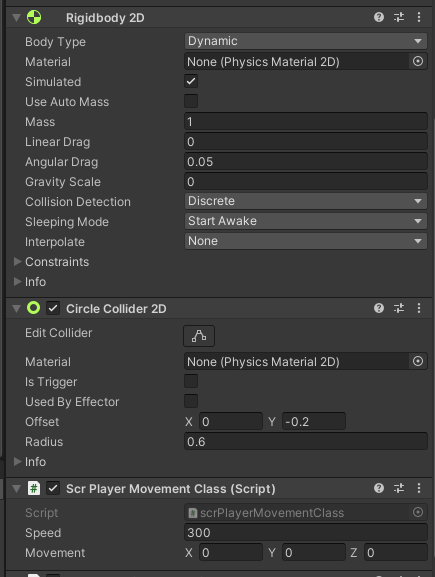
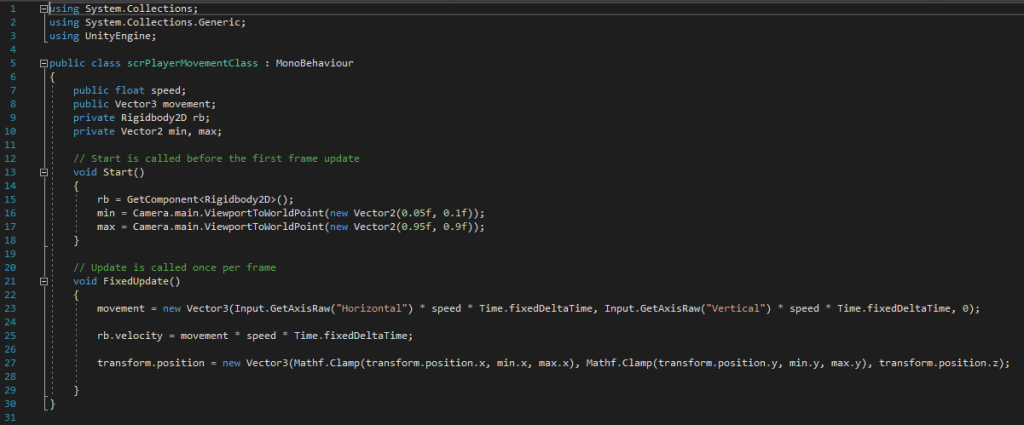
Once again I added a public float variable to influence my speed (making sure it was public so I could tweak that value in the inspector rather than hard coding it into my movement. This code works by fetching two components I had added to my player prefab previously, those being Rigidbody2D alongside the Animator component which was added whilst I created my transitions between animations. (I had also added a Box Collider however that wouldn’t be used until later on).

After it had called these components when the game began to run, I then used a fixed update so that it checks similarly to a regular update however isn’t effected by a higher framerate which could cause some issues later on such as animations playing too fast or incorrectly. The Fixed update then Uses a Vector2 to increase the velocity on the rigid body, along the X axis when the player uses a “Horizontal” input.

These include the Left and Right arrow keys and the AD keys and are found within the project setting input manager.

The last bit of code checks if your movement is <, > or = to 0 which essentially means if you are heading left right or not moving respectively it then sets walk state to the appropriate number linking the conditions between the animator and the script.

When I wanted to add different idle animations depending on the way the character was facing I realised I could only create certain links between different states, for example while I could be facing right I wouldn’t put a link to the facing left idle only between its facing right idle and vice versa. This meant I didn’t have to include another condition within my animator as both my idles could be set to 0 as it would still work alongside the script

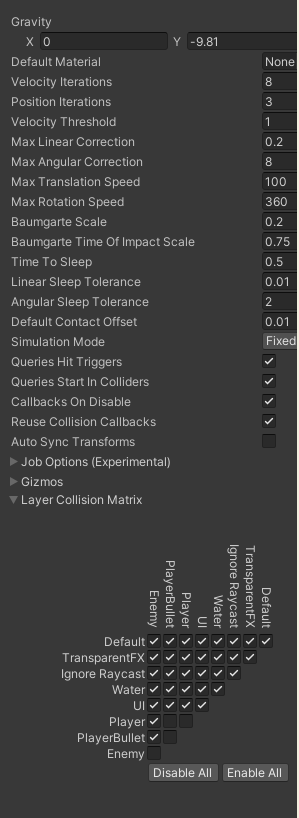
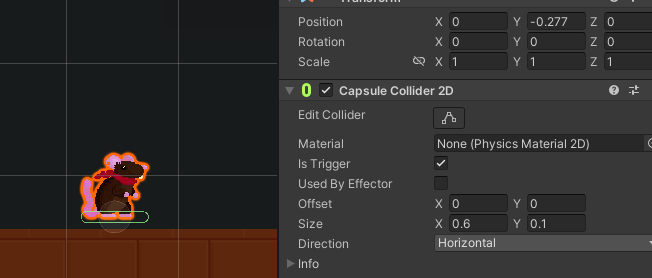
I attached the movement script to my player prefab before starting a new jump script. just before that however I had to add a new empty child object (Called GroundCheck) onto my Player prefab, this would house a capsule collider on my sprites feet. Alongside some Tags for my player prefab (Player), Cat paw (Enemy) and Ground tile (Ground) all of which will be important for later scripts.

This will allow the object to check what is beneath them.
scrJump

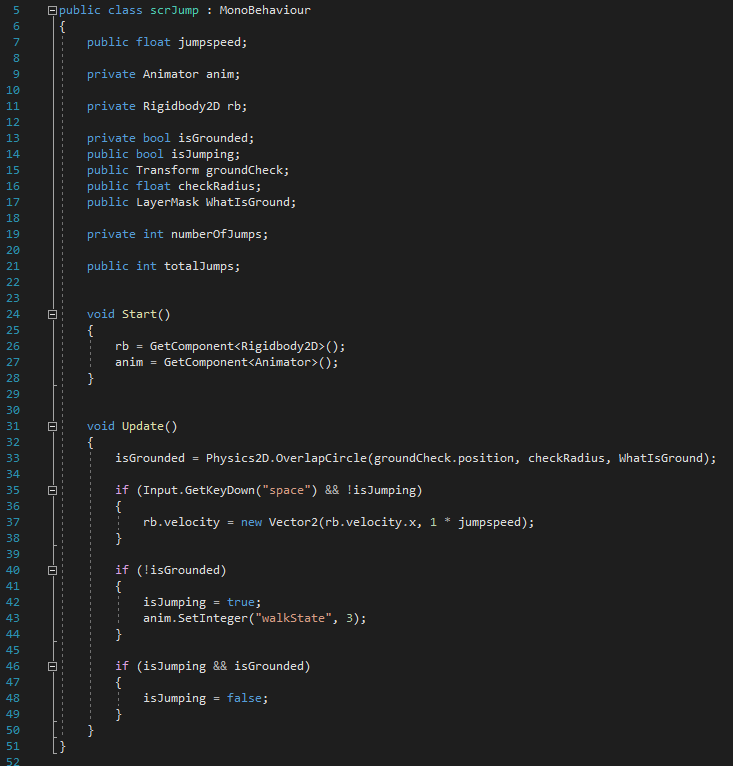
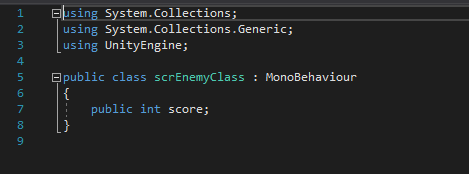
This scripts starts by declaring many variables such as the Animator, which is used to change the walkstate again whilst the character is in the air and Rigidbody variables again to be used similarly to what was done in the previous script. however Some Bool variables (True or false) need to be included so that my character cannot move feely along the Y axis, as while the physic used in the Rigidbody component will make me fall back down, I could repeatedly press the space key (as is declared in line 35) to continue making my character jump upwards, defeating the purpose of my entire game. therefore when declaring the if statement in line35 another requirement is added !isJumping (which means isJumping is set to false)

isGrounded checks if we are touching the ground due to the collider component of the Groundcheck object. If that object is toughing anything tagged as ground the Bool is set to true due to it being a child of the player. isJumping asks if the player is in there air which is known if isGrounded is false. Therefore is both is true, only isGrounded can be true otherwise the script will restrict the player from jumping.

there is also a public integer that would allow me to set the total number of jumps however this goes unused within my final game as I didn’t want to feature a double jump.

scrJump component within the player object inspector

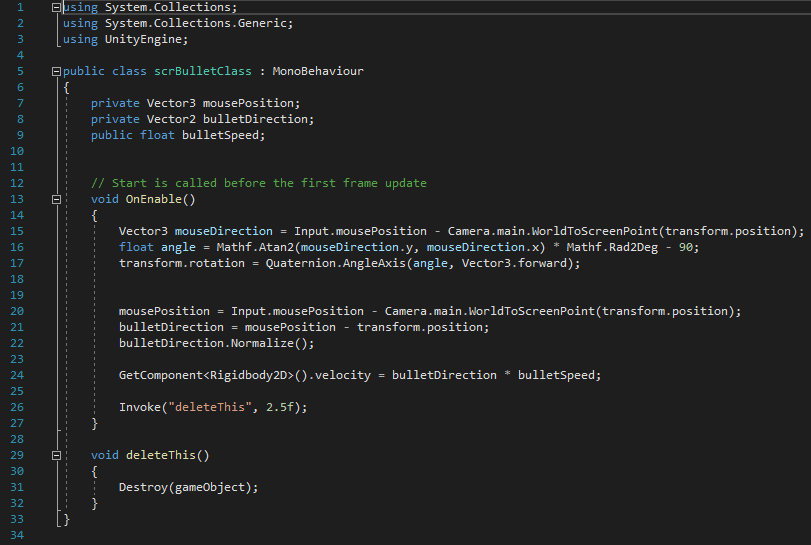
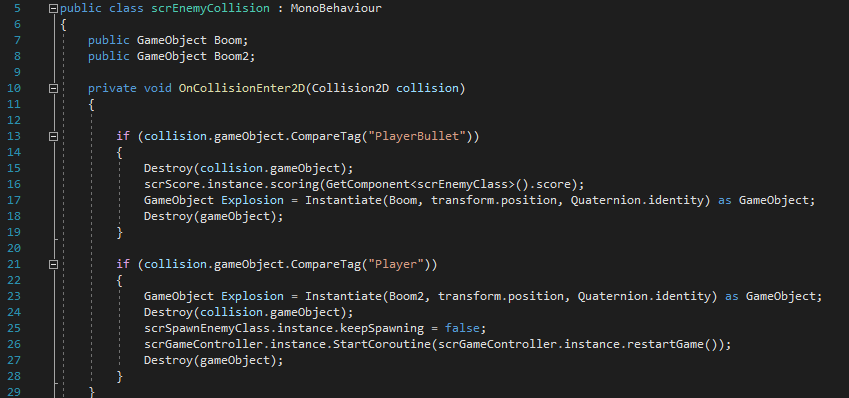
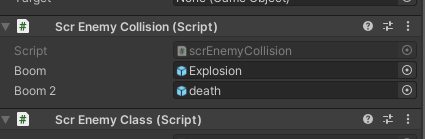
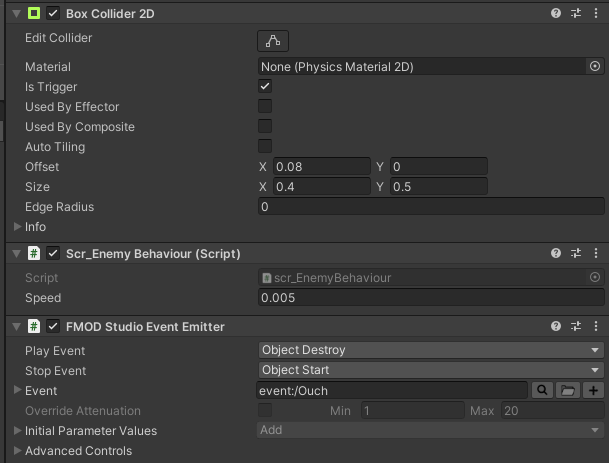
Following this I then began the kill script which would destroy the player object if it came into contact with the mousetrap or catspaw. first however I needed to add a Rigid body and Box Collider 2D to both to ensure they had collision and physics.

scrDeath

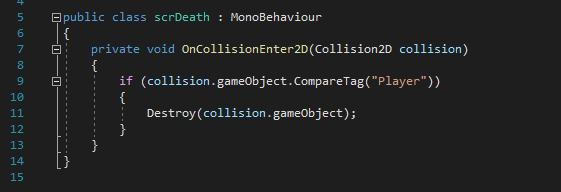
This is the full script I attached to my hazards, this checks if what collided with it was tagged as a player, if so said object is destroyed.

I would later reuse this script for my end goal

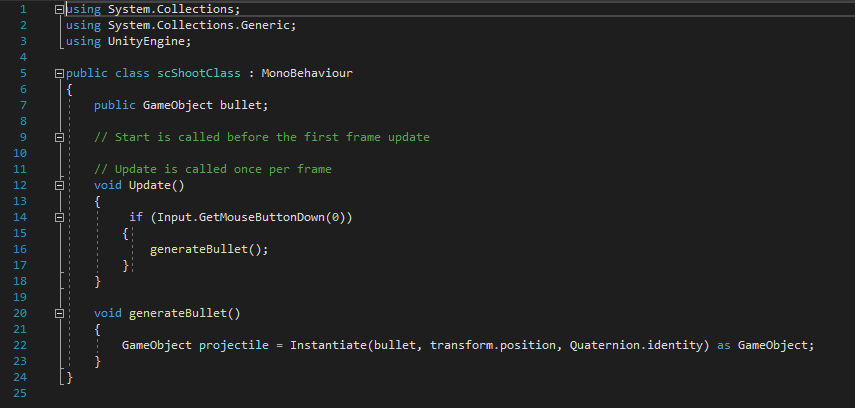
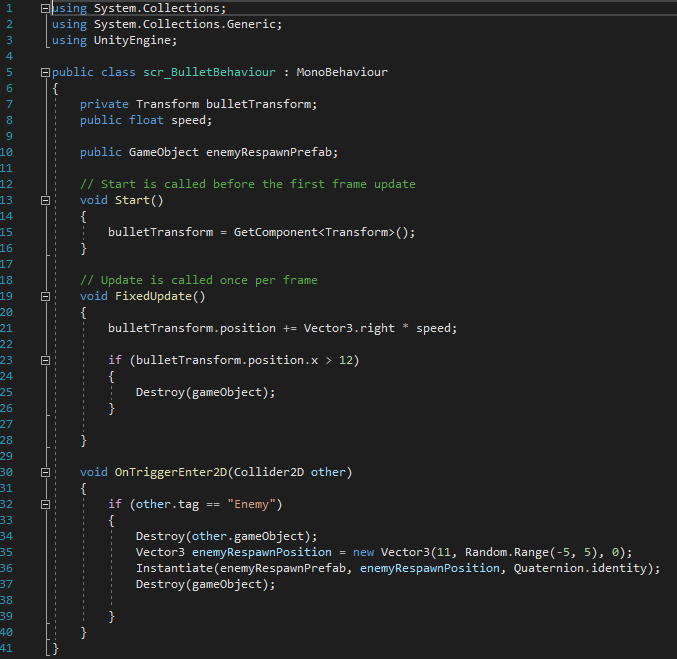
However I wanted to be able to kill the catspaw and bounce off it like you do when jumping on the heads of enemies in other platformers, therefore i reopened the groundcheck object and wrote a new script:

scrKill

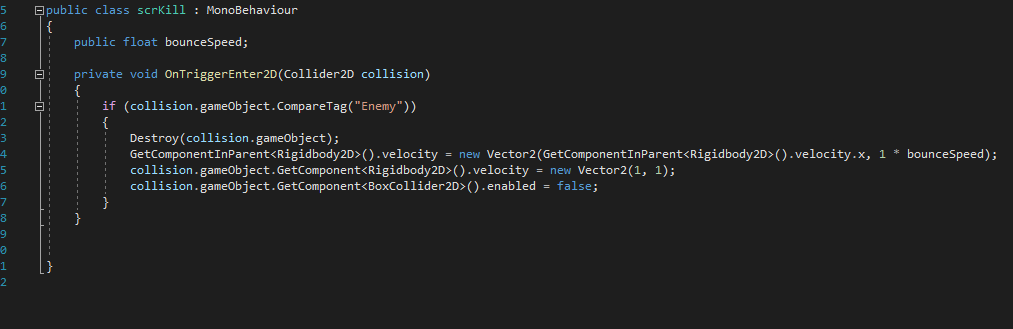
Similarly to scrDeath, this checks if the object Groundcheck has collided with is tagged enemy, (which the catspaw is) if so it destroys the object and allows the player to bounce upward using a Vector2. this is a public float so the value of this can be changed within the inspector.

The reason this works is due to two reasons: Groundcheck isnt tagged as player so the two objects don’t destroy each other and the collider is only at the feet on the player sprite meaning it can only collide from above for this to take effect.

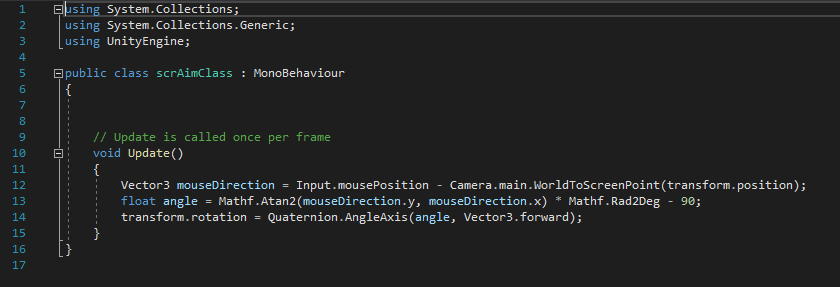
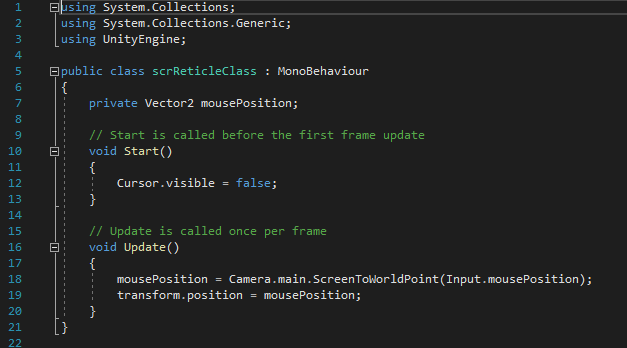
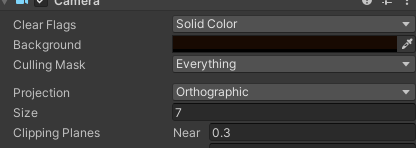
Now that all my objects were working correctly I needed to program the camera to follow my characters movements, whilst I technically could attach the camera to my player character. instead I decided to create a script for more consistent and smoother camera movement.

scrCamera

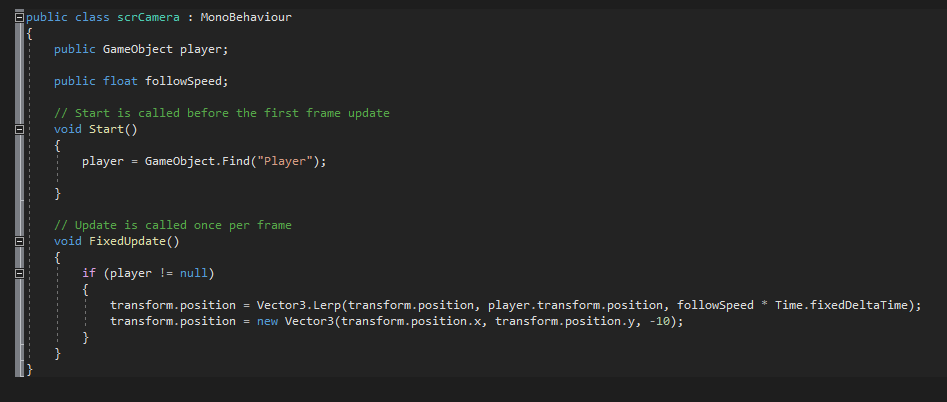
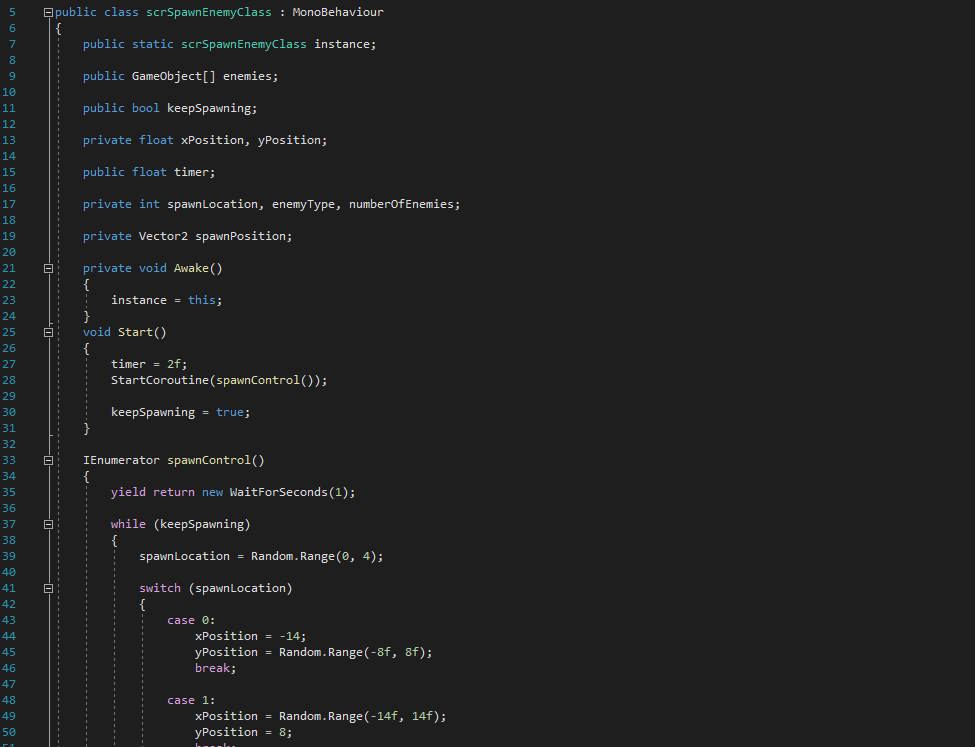
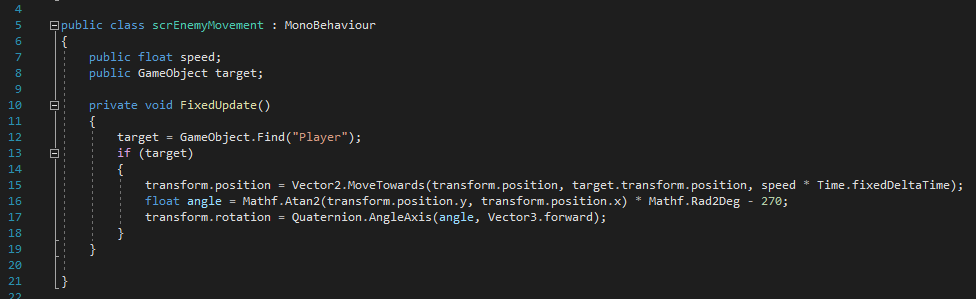
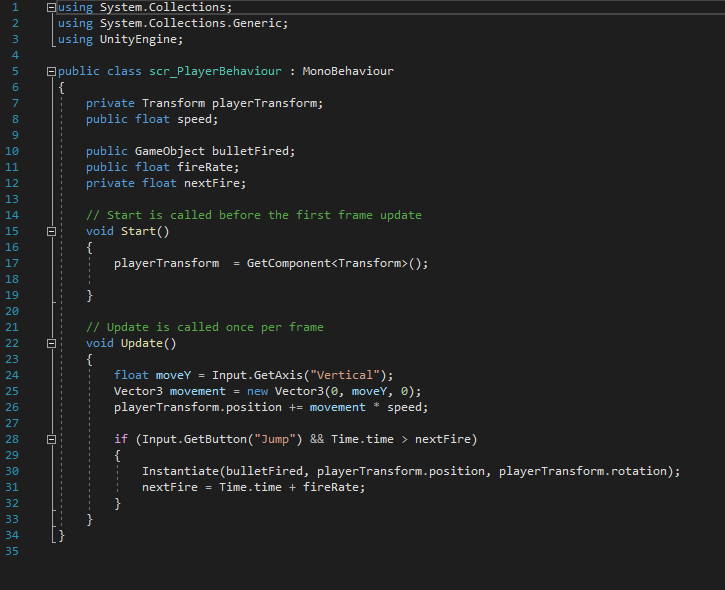
The public float variables allow me to determine the speed at which the camera follows my player object from the inspector. similarly to how my zombies functioned in my top down shooter prototype (Link here: https://baines-2022.hulldesign.co.uk/2022/11/25/prototype-3-trench-raiders/ ) I use Game object. Find (“Player”) which makes the object target the object called “Player” which in this case ins the controllable character.

The second portion of the code transforms the position of the camera to move towards its target. “.lerp” is used to create a linear path between two points that being the cameras current position and the players current position. The camera follows along this linear path at all times.

it is under an if statement, simply because it the character was “null” (gone from the scene) this could cause some issues in which the camera tries to find the object but cannot and could lead to a crash. This needed to be avoided as in this prototype the players object can be deleted.

Finishing Touches

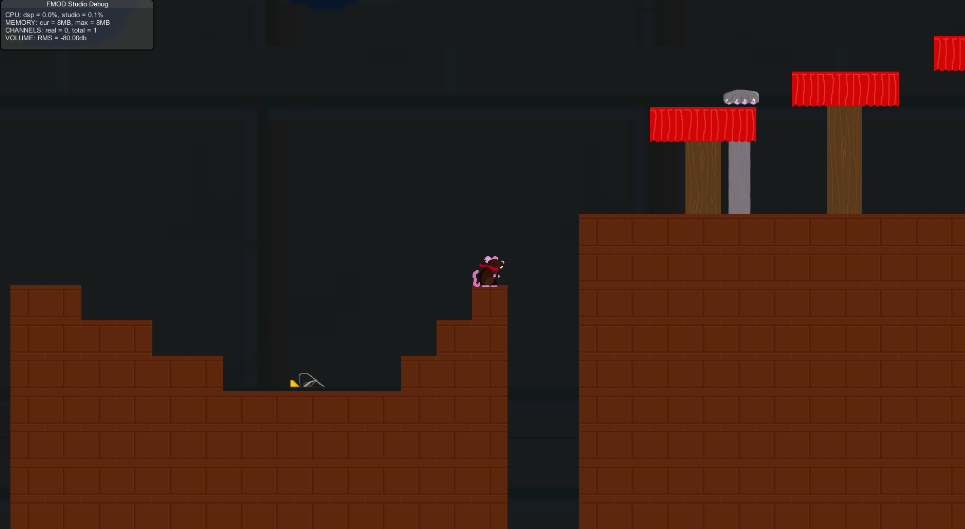
With all aspects and mechanics working this allowed me to finalize the level design to make sure it was fun, challenging but also not unfair.

I made sure to create a safe obstacle at the start of the game to ensure the player was free to experiment with the feel of the jump mechanics before putting them in any real danger.

Here is my final level design, I had made some improvements too following feedback from a peer who attempted my prototype. I also included separate paths to the goal similar to what can be found within the 2D Sonic the Hedgehog titles.

Following this I then added some assets to be used as decoration such as table legs for the tables and arms for the cat paws, alongside a backdrop i created to mirror that of my stimuli.

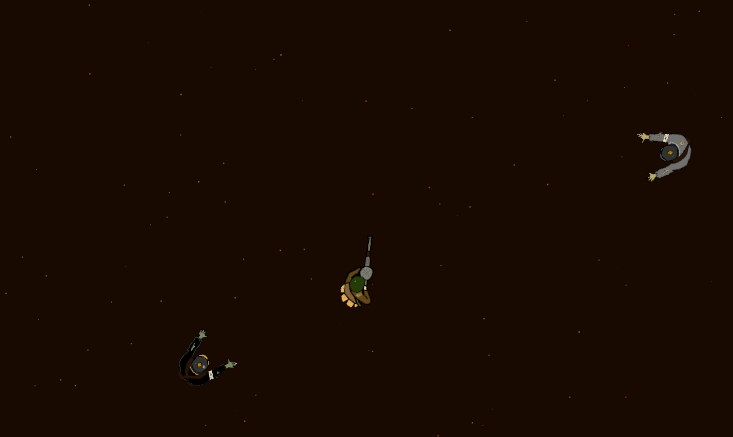
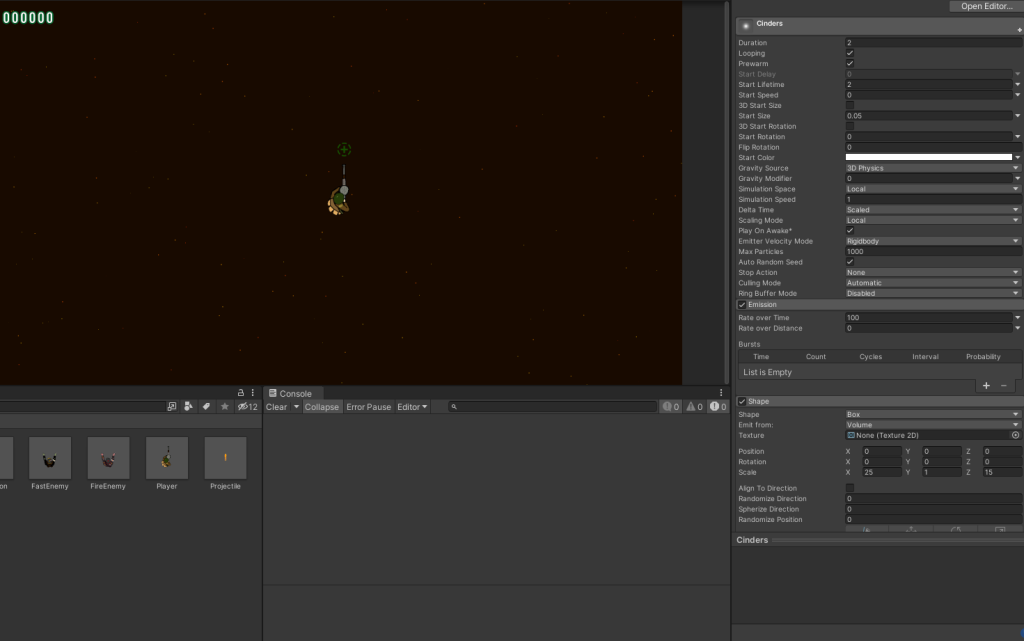
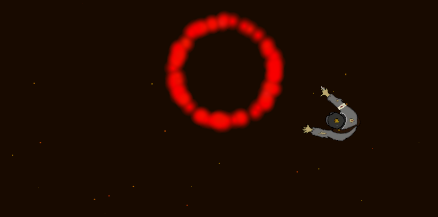
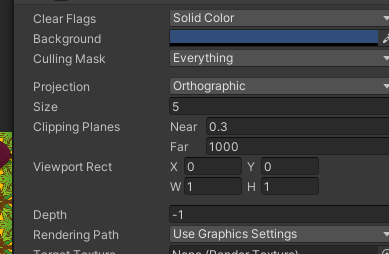
I also tried creating a series of particle effects to use as a starry nights sky in combination with a colour changed camera background, however I was unable to get this to work.

Camera Colour changed to a dark blue to match the nights sky

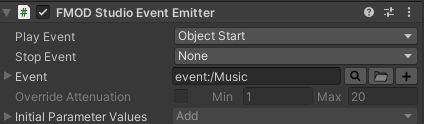
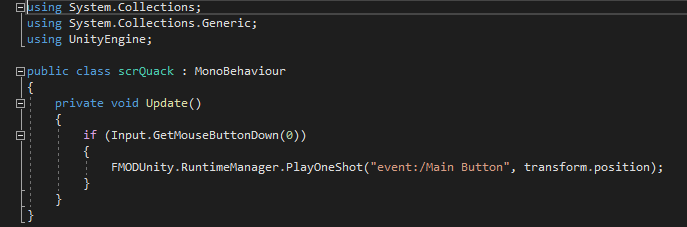
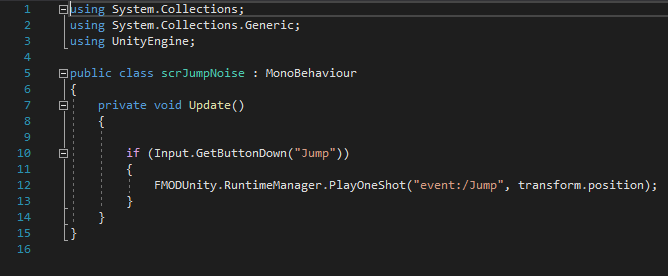
Much like my previous projects I also included implemented Fmod by replacing the unity listener with an Fmod equivelant.

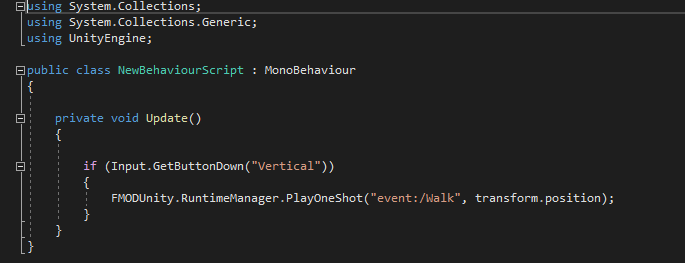
I also added some Fmod emitters for sound effects on certain queues and also a short script to play a sound event each time I jumped

scrJumpNoise

Conclusion

Whilst not the most challenging or the easiest I had done so far, this final project was extremely rewarding for me to complete. i feel with a little more time I could expand my ideas and create much nicer visuals for this game. It was also very fun experimenting with my animations.

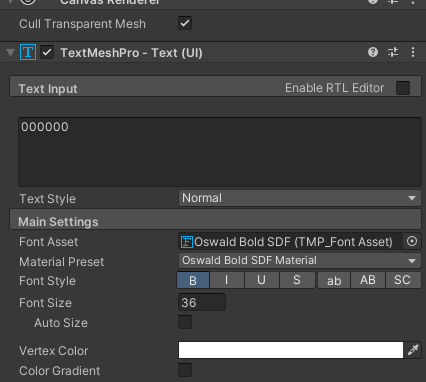
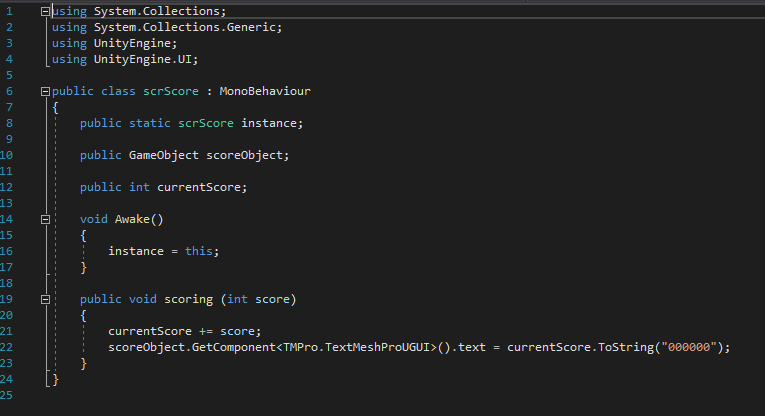
However I am not 100% satisfied with the state this prototype is in. For example when you fall down a pit in my platformer nothing happens to you where instead I should’ve created a large empty2D object with a box collider with the scrDeath script attached to kill you. Furthermore I had an idea to add a score system like my previous prototypes. implementing a canvas to create a HUD for the player that displays their score.

I even created a cheese asset to work along side this:

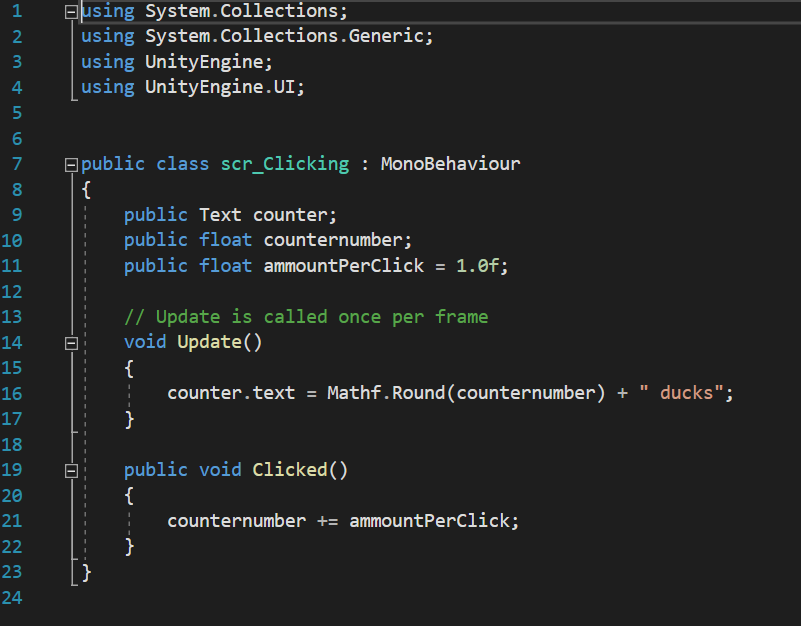
Looking back upon all my prototypes, I realised I have learned a lot about the unity engine and things that would confuse me whilst coding in C# now make much more sense to me once I have put this into practise. looking back into how I found the simplest cookie clicker project is quite eye-opening for me and I look to expand my knowledge of unity in future projects to come.

The Project is playable here:

https://anonamigo.itch.io/ratrace

Categories
Games Design and Prototyping

Prototype 3: Trench Raiders

Concept Stage

Our 3rd prototype was to be based around that of a Top Down Shoot ’em Up arcade game, in which enemies would come in from all corners of the screen to attack the player. If they did, it would be game over. In this case i toom inspiration from my own personal interests and childhood. I recalled playing the Zombies game mode within entries of the Call of Duty® franchise in my youth and whilst those games were 3D, i could only help but draw similarities between the two gameplay styles, both of which required the player to swiftly move around avoiding collision with the pursuing enemies whilst shooting them to ease up the enemy population on the screen. the more you killed. the easier it would be. I decided to take this rewarding game loop and input it into my project with a 2D twist. i would also base the game around WW1 as that is usually untapped territory for games as far as a stimulus would go (usually opting for the WW2 instead). I also personally have always been interested in this conflict so I decided to add this for a unique theme as well as a bit of personal flare.

Design Stage

I began by creating several assets that could be used for my game. such as the player, projectiles and enemies. much like I did with my second Prototype Link here: https://baines-2022.hulldesign.co.uk/2022/11/25/prototype-2-gold-hoarder/

I made sure my base enemy was simple and adaptable so I could retool it for different enemies down the line whilst still being visually clear it was an enemy.

Player Character Sprite
Base Enemy Sprite
Bullet Sprite

Implementation

Once again I appropriately titled my 2D Core Project and opened it within version 2022.1.7f1. I once again started by splitting my game and scene views and adding appropriate folders within the assets list (Sprites, Prefabs, Scripts etc.)

My main priority lied in that of the player character as it was imperative to give the player something to control so they could actually play the game.

I started by dragging my player sprite into the scene and setting his position to the centre of the camera. Following this I created a player Prefab and added two components onto it (these act as functional pieces to the object and allow collision detection and scripts to be applied to objects) a Rigidbody 2D and Circle collider 2D. This gave the player collision, something my character lacked in my previous prototype, and could now react to other objects with their own colliders.

Player Components

I also turned Gravity Scale to 0 so my character wouldn’t fall off the screen (Which happened after i pressed play to test my script later on) and also reduced the circle colliders radius and added a small offset so that it may better reflect the in game sprite so the player doesn’t feel as though they were incorrectly damaged by an enemy when it collides with them.

I the Began coding a new C# script I had created in the scripts folder: scrPlayerMovementClass. This was to allow the player to move the character around the scene. By setting a public float this also allowed me in influence the speed of my character in the components of the object (as depicted in the image above) rather than hard coding it into the script which would be harder to adjust. it also held a secondary purpose which was to use the Rigid body Component I added previously to make sure I couldn’t move outside the bounds of the camera by setting a minimum and maximum distance which was done in lines 16 and 17 as you can see below. By calling upon a component named Rigid body in line 15, it then allows the component to check whether the Player object its within the minimum and maximum distance set.

I also added a child object under the player object at the tip on the gun barrel on the player sprite. This is useful since it is apart of the player object everything that applies to the player applies to it also. Therefore i cane make sure later on that a projectile is spawned at the tip of the sprites gun rather than instantiated from anywhere on the player, which may look odd to some players.

The Vector3 in line 23 allows me to influence my position by using the WASD keys or Arrow Keys as that is what “Horizontal” and “Vertical” are bound to in the Unity project settings. This is achieved by use of transform.position which allows the transform component inside the player object to be altered but only the values within “position”.

Bullet location child object attached to the parent which is the player Prefab

Following this I needed to create a way for the player to aim, decided to use the mouse input as it would be the most accurate way for the player to aim.

scrAimClass

This was simply done to update every frame and influence the player rotation in the transform component much like what was done for moving the players position earlier. In line 13 I had made a quick edit so that rotation is increased by 90 degrees, so that the gun barrel line up with my mouse.

Following this I realised I needed something to actually aim with, so I quickly put together an aiming reticule that would follow my mouse and visually show the player my bullet trajectory.

Reticule

I the created a new object for my reticule and new prefab and opened a new Script to make the object function correctly.

scrReticleClass

This uses a Vector2 to transform the Reticules X,Y coordinates to match that of the mouse position every frame (which is achieved by void update). In line 12 I also added a command to remove the mouse cursor whilst it is within the bound of the camera. I the bound this script to my Reticule prefab and had a working reticule controlled via the mouse.

Following this I created a new object using my projectile sprite and created that as a prefab which will be important later. once again I added the Circle collider 2D and Rigidbody 2D Components (once again setting gravity scale to 0 so the bullet wouldn’t fall off the screen to allow my projectile to have Collison. I then created a new script:

scrBulletClass

I set three variables to control its speed, direction and also the mouse position. Under OnEnable (which equates to when activated, in this case when it is spawned) I repurposed the same code used for my characters aiming, this meant I was able have my bullet be facing where the mouse was when clicked, rather than always facing upwards. furthermore due to it being under OnEnable rather than Update. its rotation stays the same rather than following the mouse like player as it isn’t updated each frame, only when it is spawned. Other than the rest of the script is used to move the bullet towards the mouse’s position when it was spawned, yet “Normalize” ensures the object doesn’t immediately go and stay at the mouse’s position and the float bullet speed allows me to control how fast the bullet moves within the objects inspector. Finally line 26 calls upon a new line after 2 and a half seconds to delete the object. This was done as after 2.5 second the object will no longer be visible on camera and can be deleted from the hierarchy so that later on, multiple objects do not slow down the game.

This script was then attached to the projectile prefab and set the speed within its component.

scrShoot

This next script was attached to the Bullet location child object, attached to the player prefab. This calls upon a new game object to be instantiated, in this case it is the projectile. This only occurs if the left mouse button is clicked however as it is controlled by an if statement on line 14. i made sure it GetMouseButtonDown rather than just simply GetMouseButton as this would allow the player to hold down Lmb and make the game far too easy.

Now that I had finished the way the player interacts with the game. It was now time to create the enemies for the player to face.

I edited my original Enemy sprite and created these two variants which can be assigned different values to make them more difficult in game. I created two additional Prefabs to control these enemies which were identical to the original.

For simplicities sake, and to potentially ease any problems whilst debugging, I separated the scripts into different parts controlling the movement, collision and spawn conditions.

scrEnemyClass

At the start of this code i create 3 different types of variable: A Bool (which is either true or false) to control when the enemies are allowed to spawn, A Float to control the timer as well as the coordinates the enemies can spawn on and an Integer which controls where enemies spawn, what type of enemy they are and how many spawn. as soon as the program is run, this script starts and sets the Bool to true, meaning from here on out the code beneath line 37 will be run infinitely until the bool is turned to false again. Upon start a coroutine is started which adds a delay between whine the while loop can run, ensuring lost of enemies don’t spawn suddenly all at once.

Meanwhile the code between 41 and 61 starts a case basis in which enemies can be spawned anywhere between the coordinates within a randomly selected case. This allows enemies to be spawned beyond camera view so they don’t look to the player as if they simply popped into the scene. once a case has been selected, they will spawn thanks to the code between lines 63 to 68 via Using a Vector2 to change the transform when instantiating a new game object.

Finally the code below randomises which type of enemy to spawn and adjusts the timer.

scrEnemyMovement

This next script sets a target to find a game object ,”Player” which of course is the player character. if the script can find “Player” (essentially if an object called player is within the scene) it will use a vector2 to change the transform component by altering the X,Y position values to go to the players current position. It doesn’t do this immediately however thanks to the speed value I set earlier. Finally I once again retooled the rotation code from the scrAimClass so that the enemies rotation would always be facing towards the player character. (However whilst this did work. it sometimes doesn’t work correctly and will rotate the sprite further than intended.)

scrEnemyCollsion

This script was used to destroy the object if collided with either the player or a bullet as well as destroy the object it collided with. Also in the case of colliding with the player, the code would also set the Bool from earlier to false, stopping enemy spawning.

All of these scripts (bar scrEnemyClass) were added onto my enemy prefabs and any public variables such as speed were given different values

For this to be achieve however I needed to add tags to both my player and projectile. This was simple enough to do as I simply needed to click on a drop down menu and add a new tag named Player and PlayerBullet to my Player and Projectile prefabs respectively.

Collision Pyramid

Following this I then needed to head into my project settings and make sure that objects that shouldn’t be able to collide (such as the player and the bullet) can’t this was done by unticking boxes within the collision pyramid.

At this point I had a working player, shooting mechanism and enemies all with the correct collision. However after recalling my stimulus it occurred to me needed a reason to continue playing, therefore I begun work on a scoring system the score would be displayed in an editable textbox situated on my UI.

I began by creating a canvas to house my UI elements following this i created a textbox which I then input a series of six 0’s to display my increasing score.

In addition to adding text in the component I also edited the font

I then began working on a series of scripts to add this mechanic into my project.

scrEnemyScore

This is a simple script I attached to my enemy prefabs to give them a public integer I could use to give them varied score value.

scrScore

This script imports UI control (Line 4) and sets a new instance for itself when the object this code is bound to is active. Furthermore it adds the integer variable score onto itself to increase itself whilst also binding itself to the TMP asset that reads 000000 which I had set earlier.

I bound this part of the code onto an empty object I named game controller in my hierarchy. I then dragged the score button into the public GameObject box so that it would be effected by my code.

That empty object was also where I added the scrEnemyClass Script, that way it is always active whilst the game is running unless told not to.

Finishing Touches

I started By changing my camera settings to a brown background similar to the mud of the trenches during WW1:

Following my mechanics being polished off and adjusting the collision circles around my sprites to fit snugly. I began to work on a main menu as well as death screens for this project.

Main Menu
Death screen

This was done by creating a new scene called main menu in which all was held in a canvas that was comprised of a one button. i made this by Typing out the text in the child’s components of the button and reducing to colour of the button to be transparent. I then created a new script:

scrMenu

Here I imported the Scene Manager (Line4) which would then load scene 1 (my main game) a similar method and script was used for the retry screen.

scrGameController
Button component that loads the script in the GameController Object

On the retry screen however, it also needed to activate the button which was previously set to inactive.

I also experimented with some particle effects:

“Cinders” object is an overlayed on the scene that has twinkling ashes that burn out overtime. this was inspired by similar use of ash in the game Battlefield 1
Here is an explosion which happens when an enemy is killed, unlike cinders which used a box shape, this used a circle. i had the colour change over its lifetime from green to red to black to imitate the zombies body exploding into a pool of blood. A similar explosion also occurs when the player dies, but instead goes simply from pink to red.
Zombie death explosion component from the Enemy Collision script.
Final Particle effect was the burning embers featured on the title screen

Finally i also implemented Fmod into my Game via the package manager. I once again removed the unity listener and replaced it with the Fmod Listeb and added a small script onto the player that would play a footstep sound effect as the player moved:

scr Walk
I also added some event emitter components for my projectile and zombie. i also added them onto my camera to play some ambience and music.

Conclusion

Whilst this project was certainly the most expansive and time consuming yet, I also feel that this was my most successful project yet and I believe I creatively retooled assets and scripts to serve other purposes within my scene. Surprisingly, this was also the project in which I had the least amount of roadblocks stopping me from successfully completing my project. this could be due in part to my knowledge of the Unity editor expanding along side the fact I’m continuing to familiarise myself to the editor.

However I did want to create an enemy that also shot projectiles by reworking the script used for the enemy spawning as well as the projectile script. however I was unable to succeed in making this work within my time constraints.

Unused Fireball asset for a potential projectile based enemy

The Project is playable here:

https://anonamigo.itch.io/trench-defender

Categories
Games Design and Prototyping

Prototype 2: Gold Hoarder

Concept Stage

Our second assignment was to create a prototype based around the classic arcade title: Space Invaders. To create this I would need 3 primary assets: The Player Character who can move along a set axis as attack, An Enemy to move toward the Character and be able to be damaged, and finally a projectile to link the interactions between the two.

Typically, in a space invaders styled game, the character can move along the x axis and can fire upwards towards enemies dropping down from the top of the screen. However for my game to stand out not only would i need a unique theme other than interstellar battle ships and aliens. i would also require a twist on the formula to engage with the player and give my game reason to exist. Therefore i had the idea to physically put a “twist” on the gameplay by rotating the axis the game is played on by 90 degrees. this way the character would move along the Y axis rather than the X, and the enemies would attack from the side of the screen rather than the top.

in the end I went for a pirate theme as with all space invader games, you the player are playing a defensive role against the offensive enemies. therefore I gave my prototype a pirate theme in which the player defends their pile of gold from a hoard of pirates.

Design Stage

Before I began my project, it was important that I begun to create some assets for my game so it would have some appropriate visuals to go alongside my theme.

I created sprites for the player, projectile and enemies alongside a background for the games setting.

Player
Enemy
Projectile
Background

Implementation

I created my project in a 2D Core template in Unity version 2022.1.7f1, as is the standard for all my prototypes and begun my project by separating my scene and game views for debug purposes and begun my file structuring as to bring a more cohesive structure to my project whilst creating it as this was a problem for me during my cookie clicker prototype.

I created 3 additional folders those being Sprites, scripts and prefabs. Since i would be using multiple projectiles and enemies in this game, all of which needed to have identical properties, i decided to utilise prefabs in my work to smooth out the development process. Prefabs copy the identity and characteristics of a game object and allow all components of the object to be edited from the prefab, this was useful later on whilst i was tweaking the enemies speed. by dragging the object into the prefab folder. it created a prefab copy of the object which could be placed and edited without needing to make the same edits to the components of every instance of the object. only that of the original prefab. it works very similarly to inheritance in object oriented programming.

scrPlayerBehaviour

After I dragged my player sprite into the scene window, i created a new C# script (Rmb>Create>C# Script) in my scripts folder and named it with my scr naming convention. The variables listed at the top of the image above allow my player to move and create a public variable called speed, in which I can change the value within the object inspector as it is set to public rather than private. The other variables allow the script to create a new game object and set a delay between creating the new object. “nextFire” is exclusive to this script as it is set as a private variable meaning it cannot be edited outside Visual Studio (which is the program i used to write my C# code).

The Void Start commands declares the code be ran as soon as the game is started. in this case it fetches the component “transform” which is used to edit the scale, rotation and position of an object. This was vital for creating movement for my character as the code would need to change the objects position on the Y axis. calling upon the component allows it to do so.

Void update (as the // note infers) calls the code within its {} once every frame. essentially allowing this code to be running repeatedly all throughout gameplay. The float value “moveY” will be used to change the Y value in the transform component mentioned earlier. this is done via a Vector3, which can change the values of 2 independent numbers. Since unity runs on an X,Y,Z Format a Vector3 is used so we can hardcode the values of X and Z to zero to ensure the object never moves on those axis, whilst moveY is input on the Y axis, allowing player movement when pressing any “Vertical” buttons.

“Vertical” applies to the input manager within the project settings manager of unity. In this case, “Vertical” refers to pressing either the Up and Down arrow keys or the W and S keys which will increase and decrease the Y value respectively.

Finally the if statement allows the player to instantiate the game object referenced earlier, as well as set a short delay before creating a new one. all done by pressing the space bar (“jump”).

I then attached this script upon the player object, as well as the associated sprite within the objects inspector. Here I also input the speed within the script component.

Player object’s components

Following this I began to create the enemies, the player would attack. I created a new 2D Object and then begun work on this next script:

scrEnemyBehaviour

This, like the player script, sets a public variable for me to adjust its speed within the inspector as well as allows the asset to move left across the screen due to the code under void update. I assigned this to the enemy object and created a new prefab for the enemy in which I then similarly added its corresponding sprite.

Finally it was time to create the projectile object. once again I started by creating a new 2D object and then begun creating a new script:

scrBulletBehaviour

Under Fixed update, i added a small line of code that checked every frame if the object this script is attached to is beyond 12x, if so the object would be destroyed. i added this afterwards to make sure that the object does collide with any respawning enemies, as well as making sure that I wasn’t spawning an obscene amount of objects which could later impact my games performance had I played for long enough

The variables above allow me to once again control the objects movement and speed, but also create a new object. enemyRespawnPrefab. this does exactly what you would expect. On a trigger with an enemy the enemy would be destroyed and a new object would be spawned just outside of camera view (which i had changed earlier within the inspector), and anywhere along the y axis between the range of -5y to 5y (this was done by use of Random. Range). Finally after all was completed the object would then destroy itself.

This code allowed me to attack enemies with a moving projectile as well as ensure more enemies kept spawning, negating the need for multiple enemy objects to be placed within the scene.

For this to work however i would need to Tag my enemy prefab as well as add some collision triggers to both my projectile and enemy.

I created the tag for the enemy within the prefabs inspector:

This was necessary to make sure these actions would only be performed if the object it collided with had the following tag.

I also added a box collider component for both the enemy and projectile. which I later scaled respectively for QoL purposes.

The Green box indicates the area of Collison around the object
Box collider component being shown in the inspector view alongside the attached script with its speed and an FmodComponent which allows the object to play a sound after it has died.

Finishing Touches

Following this the main playable features of my game was completed. I then added the background I had created earlier and placed it at 1 on the z axis so it would appear behind my sprites. Apart from this i also intergrated Fmod into my game via the Package manager and deleting the Built in Unity listener, replacing it for the Fmod one. i also created a series of events for when projectile is spawned and an enemy is destroyed to play a sound effect.

I also added a small script and attached it to my player character in which my intention was to play footsteps as the character moved. This didn’t end up working how I would’ve like however and I would fix this if I had the time.

Finally I also later went back and created a particle effect to be placed above the gold pile in my background to make it sparkle and shimmer. which i believe added to the theme of my game.

Conclusion

whilst I’m happy with the base mechanics of this game and enjoyed changing the perspective to work on the Y axis rather than the X which ended up challenging me when making adjustments to my code. however i wished i had added more such as an event in which the enemy reached the gold past the player, the game would end and a message could be displayed. this could’ve been achieved by using a box collider on an empty 2D object placed behind the player along the whole Y axis in which case the code from the projectile could’ve been retooled into the enemy script to play when touching the empty Object. I also would create a higher quality background in the future if I was to reattempt this project.

The project is playable here:

https://anonamigo.itch.io/gold-hoarder

Categories
Games Design and Prototyping

Prototype 1: Ducky ClickR.

Concept Stage:

When tasked to create a portfolio of several prototypes to show my proficiency within the Unity Engine as well as external programs such as Fmod and overall competency when creating a game, we was also given a basis on what these prototypes were to be built around. The first of which, an idle clicker game, similar to the like of the popular “Cookie Clicker” style games. As with all good projects, mine started with an idea. Whilst brainstorming a theme for my prototype, I wanted my game to be a way to relax and destress. I pictured calming environments and envisioned a tranquil pond, what do you find at ponds? Ducks. It just so happened that Ducky Rhymed with Cookie and thus gave my Title: DuckyClickR

With a tone and idea in mind, now was the time to think about the gameplay loop. Of course with “Idle” styled games they’re designed to be simple and not take much input on the player therefore I looked for inspiration onto how I would be able to make a rewarding gameplay loop with minimal player input. After playing a browser version of Cookie Clicker (https://orteil.dashnet.org/cookieclicker/), I knew I had found a rewarding gameplay loop. My clicking to gain points (or ducks in my case) I could then allow the player to spend those points for upgrades into their point production, such as automating point production or adding a multiplier to each click of the primary button.

Design Stage:

Following my initial concepts, I began to work on some design elements, such as sketching out an early interpretation of what my UI could look like; as well as using specialised software to begin making important assets such as my main button pictured here:

Moreover, this was the stage in which I set up a new Unity Project using standardised 2022.1.7f1 Version I would continue to use throughout my later prototypes. Whilst I had dabbled in Unity prior, truth be told I was much more familiar with the likes of Unreal engine over Unity, I looked forward to this endeavour though to not only broaden my horizons, but also give me a fair challenge (which it certainly did).

A few early versions of what soon became the upgrade buttons for my prototype
the two images which combined made my boarder for the game. These like the Buttons were made in Adobe Illustrator.

I set up the Project titled “Ducky_Clicker_v01” in a 2D Core template and begun work on my new prototype.

Implementation

I began my prototype by setting up the project window to my liking, this included setting up folders for sprites, scenes and fonts as well as separating the scene and game views, this way I could view both my editor and how my UI would look in 1920 x 1080 (this was done by changing the game view from free aspect to 1920 x 1080 via a drop down menu) like so:

I began blocking out my UI by adding a canvas to the scene in which I then placed 3 Buttons, one as the Primary “Clicker” and two for Upgrades. These would act as the interactable with the player. Following this I then imported all outside assets like my buttons as well as a custom text font created by Seeduck on https://www.dafont.com/duck-2.font.

I subsequently created a script named “scrClicking” in the matching folder which would allow me to set the starting number of ducks collected, as well as allow me to increment them by one for every click

Void update calls the code underneath it every frame, therefor the program is constantly checking that counter. Text is updated correctly.

This was done by use of two variables, “counternumber” and “ammountPerClick”. These two decimal floats (which were originally Integers which I changed later for better compatibility with upgrades) allow the program to easily track and increase the count of ducks overtime. Upon reflection however I should have implemented better use of camel-case and watched my spelling as it would make my code easier to follow upon revisiting by making my variables more uniform like the naming convention in my scripts (“scr…”). the use of ” ducks” allows the code space to input the numbers as well as follow that with a string, making it clear to the player that they have x amount of points. i also believe it looks nicer from a design perspective rather than just some unlabelled number increasing. its also imperative that I imported using.UnityEngine.UI; so that it may link to the UI elements. In this case the buttons and text boxes.

After creating the necessary script I then dragged it onto the main Buttons inspector which attached it to the object here since i set them as public values I could drag in a text box into the Counter variable thereby setting it to display the increasing values to the player as well as adjust the values of the Amount per Click and Counter number. I also Dragged my duck sprite into the source image box to change the button into my sprite.

Following this I created a new script ,scrBuyUpgrade to begin work on the other buttons, namely that of the first upgrade. The purpose of this upgrade was to increase how many ducks were earned with each click. the C# code below shows how this was done.

By making “Current Price”, “upgrade name” and “power of” all public classes means I can tweak their values in the inspector of whatever object this script is bound too, allowing me to reuse this upgrade for a harder version to be unlocked later, which do in my final build of the game.

Simply put, this code subtracts a given value from your current amount of ducks if you have enough to afford it. It checks whether the current value is greater than or equal to the price of the upgrade, if so the next part of code is given clearance to happen which increases the amount you gain per click. following this it then increases its original asking price and via multiplying it by the number states and rounds it upwards.

All the Text below this allows text to appear underneath the UI element the script is bound to, which will display its current updated price.

Before creating another upgrade, I first created a new script to allow my count to increase automatically

The Bool variable has two states: true or false. This was used to make sure when another script wanted to start producing ducks automatically, it had to be done by calling this script. by doing this it means other scripts are less cluttered and easier to debug.

This script allows for the counter number to start increasing its duck count without player input. It first initialises itself and then starts a coroutine to make 1 duck every 0.1 seconds.

Much like the upgrade before it, this starts by comparing the count of ducks to its own value. If it is greater, it automatically increases the duck count by its assigned value, before then increasing its price but also the amount of ducks you gain per second. which is done in the “nextduckpersec += 0.25f” line.

the bottom half of the code also displays a message when the mouse is hovered over the object it is bound to. displaying the price and increased amount of ducks you gain. This is activated by the “OnMouseEnter” trigger

I also created an identical script, scrAuto2, to be used for a similar but more expensive upgrade.

After Creating these scripts I then had to bind them to the appropriate buttons. which was simply dragging the correct scripts into the inspect editor of the button and selecting the correct variables

On click allows the script to run when the button is clicked by the players, however that doesn’t mean the effects will occur due to the system of checking the price within the script itself

Finishing Touches

Following testing and making sure all aspects of my script were indeed working correctly, I then began to make some quality of life improvements such as changing the camera colour within the inspector to be a blue colour to imitate a pond, as well was texturing my upgrade buttons and giving them text. other UI elements like the boarder were also added onto the canvas after a small bit of trouble regarding scaling however that was eventually resolved.

Camera Background Colour

I added theming such as reeds and the title of the game in the top left, alongside naming my upgrades different types of food you made feed ducks with at the park, again partaking in the theme of my project.

I also implemented Fmod into my scene and added a short script so that when the player clicks a Quack sound effect (Sourced from: https://freesound.org/people/DrMaysta/sounds/418509/) would play adding to the theming of the project alongside some calming music i attached to the camera via an emitter component.

scrQuack is triggered each time left mouse button is pressed

Conclusion

This was a rough project for me to complete, and whilst I am proud of the result of my work I still had concepts of buttons that would move across the screen to give a big boost to your counter. there was many idea I feel as though I could’ve added however couldn’t due to time constraints and lack of technical knowledge. I particularly felt lost when I was having trouble trying to add the auto upgrade script. I definitely feel that one glaring fault in the unity editor is that it isn’t specific enough with its errors. Languages like python return what line the error is on, which is a big benefit for debugging. I feel as though a similar feature could work well within unity.

My problems didn’t end there as I was unable to figure out how to package my scene as a WebGL either as no matter what I tried I couldn’t make it run as a HTML.

Despite needing to familiarise myself with C# as well as use better coding practises, i left this project feeling proud of what I accomplished (especially the nostalgic early 2000s web game UI which I think fits nicely with my tranquil theme) and look to build upon my skills in future projects

The Project is able to be Downloaded Here:

https://anonamigo.itch.io/ducky-clickr-20