Concept Stage
Our 3rd prototype was to be based around that of a Top Down Shoot ’em Up arcade game, in which enemies would come in from all corners of the screen to attack the player. If they did, it would be game over. In this case i toom inspiration from my own personal interests and childhood. I recalled playing the Zombies game mode within entries of the Call of Duty® franchise in my youth and whilst those games were 3D, i could only help but draw similarities between the two gameplay styles, both of which required the player to swiftly move around avoiding collision with the pursuing enemies whilst shooting them to ease up the enemy population on the screen. the more you killed. the easier it would be. I decided to take this rewarding game loop and input it into my project with a 2D twist. i would also base the game around WW1 as that is usually untapped territory for games as far as a stimulus would go (usually opting for the WW2 instead). I also personally have always been interested in this conflict so I decided to add this for a unique theme as well as a bit of personal flare.
Design Stage
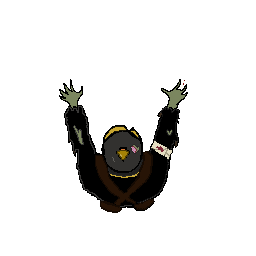
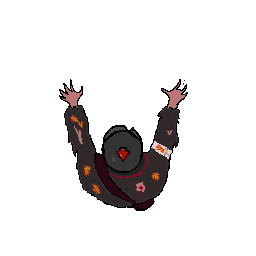
I began by creating several assets that could be used for my game. such as the player, projectiles and enemies. much like I did with my second Prototype Link here: https://baines-2022.hulldesign.co.uk/2022/11/25/prototype-2-gold-hoarder/
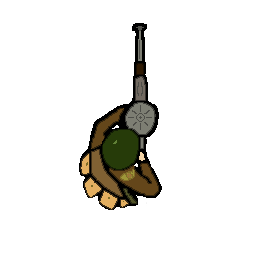
I made sure my base enemy was simple and adaptable so I could retool it for different enemies down the line whilst still being visually clear it was an enemy.
Implementation
Once again I appropriately titled my 2D Core Project and opened it within version 2022.1.7f1. I once again started by splitting my game and scene views and adding appropriate folders within the assets list (Sprites, Prefabs, Scripts etc.)
My main priority lied in that of the player character as it was imperative to give the player something to control so they could actually play the game.
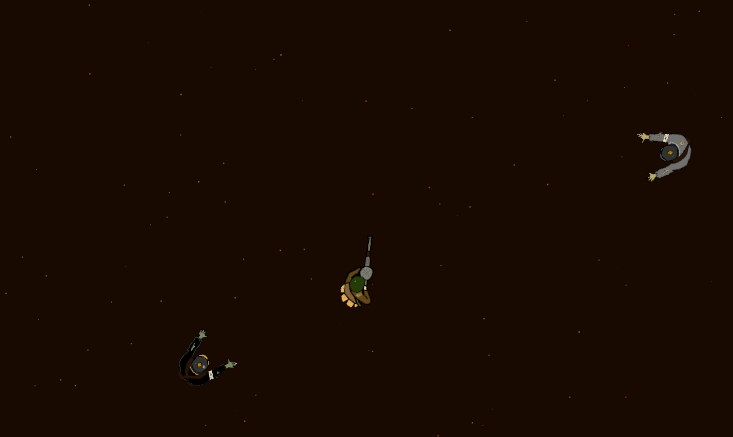
I started by dragging my player sprite into the scene and setting his position to the centre of the camera. Following this I created a player Prefab and added two components onto it (these act as functional pieces to the object and allow collision detection and scripts to be applied to objects) a Rigidbody 2D and Circle collider 2D. This gave the player collision, something my character lacked in my previous prototype, and could now react to other objects with their own colliders.
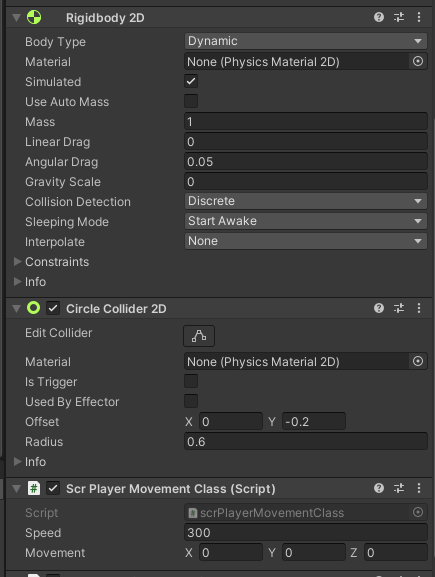
I also turned Gravity Scale to 0 so my character wouldn’t fall off the screen (Which happened after i pressed play to test my script later on) and also reduced the circle colliders radius and added a small offset so that it may better reflect the in game sprite so the player doesn’t feel as though they were incorrectly damaged by an enemy when it collides with them.
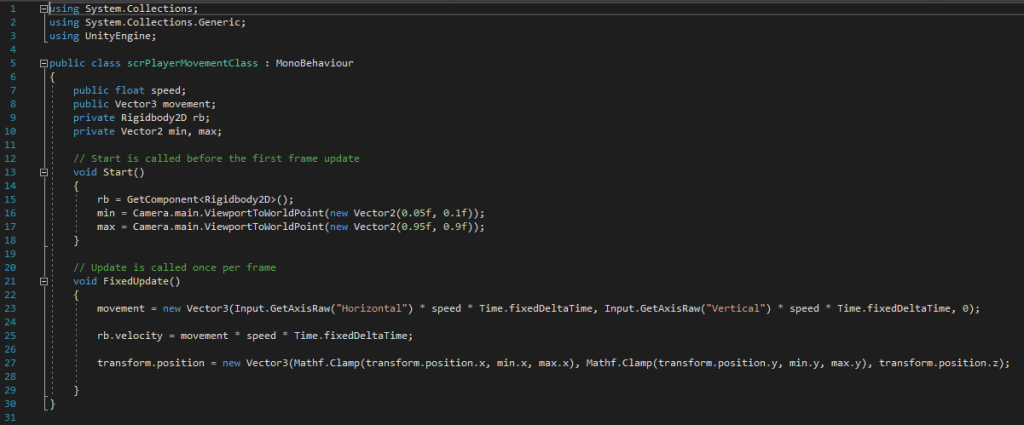
I the Began coding a new C# script I had created in the scripts folder: scrPlayerMovementClass. This was to allow the player to move the character around the scene. By setting a public float this also allowed me in influence the speed of my character in the components of the object (as depicted in the image above) rather than hard coding it into the script which would be harder to adjust. it also held a secondary purpose which was to use the Rigid body Component I added previously to make sure I couldn’t move outside the bounds of the camera by setting a minimum and maximum distance which was done in lines 16 and 17 as you can see below. By calling upon a component named Rigid body in line 15, it then allows the component to check whether the Player object its within the minimum and maximum distance set.
I also added a child object under the player object at the tip on the gun barrel on the player sprite. This is useful since it is apart of the player object everything that applies to the player applies to it also. Therefore i cane make sure later on that a projectile is spawned at the tip of the sprites gun rather than instantiated from anywhere on the player, which may look odd to some players.
The Vector3 in line 23 allows me to influence my position by using the WASD keys or Arrow Keys as that is what “Horizontal” and “Vertical” are bound to in the Unity project settings. This is achieved by use of transform.position which allows the transform component inside the player object to be altered but only the values within “position”.

Following this I needed to create a way for the player to aim, decided to use the mouse input as it would be the most accurate way for the player to aim.
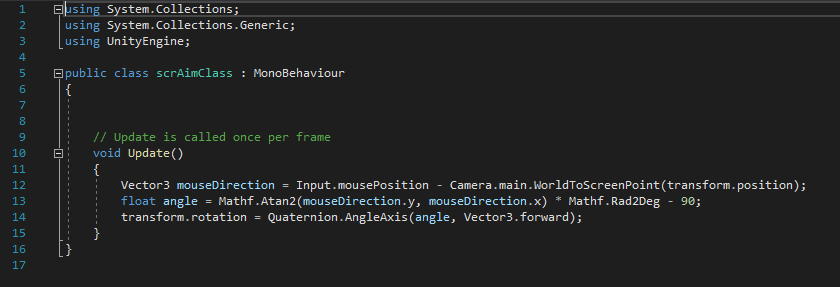
This was simply done to update every frame and influence the player rotation in the transform component much like what was done for moving the players position earlier. In line 13 I had made a quick edit so that rotation is increased by 90 degrees, so that the gun barrel line up with my mouse.
Following this I realised I needed something to actually aim with, so I quickly put together an aiming reticule that would follow my mouse and visually show the player my bullet trajectory.

I the created a new object for my reticule and new prefab and opened a new Script to make the object function correctly.
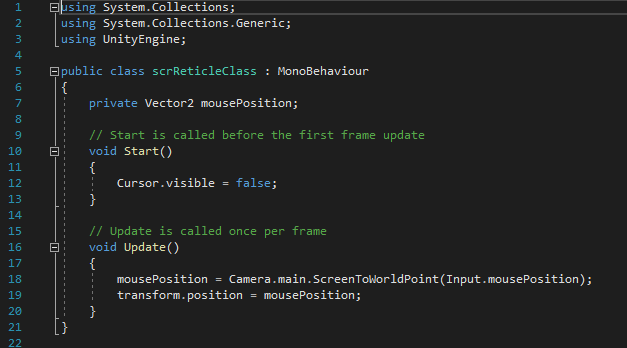
This uses a Vector2 to transform the Reticules X,Y coordinates to match that of the mouse position every frame (which is achieved by void update). In line 12 I also added a command to remove the mouse cursor whilst it is within the bound of the camera. I the bound this script to my Reticule prefab and had a working reticule controlled via the mouse.
Following this I created a new object using my projectile sprite and created that as a prefab which will be important later. once again I added the Circle collider 2D and Rigidbody 2D Components (once again setting gravity scale to 0 so the bullet wouldn’t fall off the screen to allow my projectile to have Collison. I then created a new script:
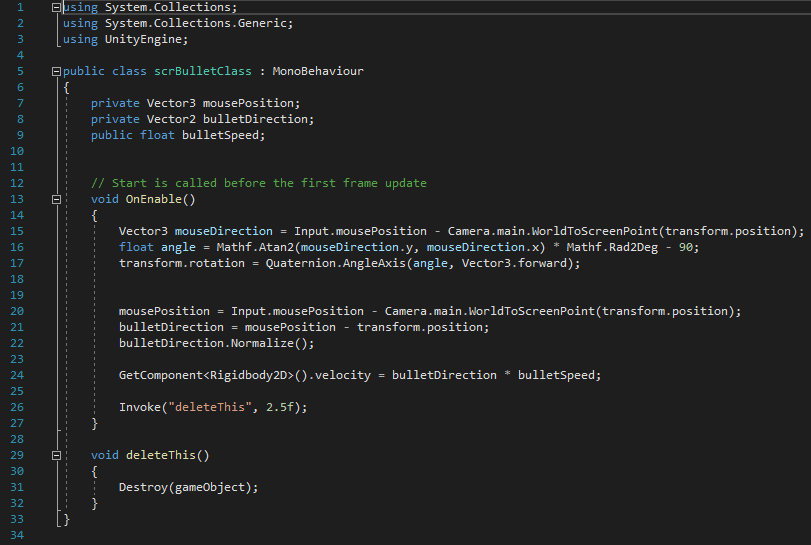
I set three variables to control its speed, direction and also the mouse position. Under OnEnable (which equates to when activated, in this case when it is spawned) I repurposed the same code used for my characters aiming, this meant I was able have my bullet be facing where the mouse was when clicked, rather than always facing upwards. furthermore due to it being under OnEnable rather than Update. its rotation stays the same rather than following the mouse like player as it isn’t updated each frame, only when it is spawned. Other than the rest of the script is used to move the bullet towards the mouse’s position when it was spawned, yet “Normalize” ensures the object doesn’t immediately go and stay at the mouse’s position and the float bullet speed allows me to control how fast the bullet moves within the objects inspector. Finally line 26 calls upon a new line after 2 and a half seconds to delete the object. This was done as after 2.5 second the object will no longer be visible on camera and can be deleted from the hierarchy so that later on, multiple objects do not slow down the game.
This script was then attached to the projectile prefab and set the speed within its component.
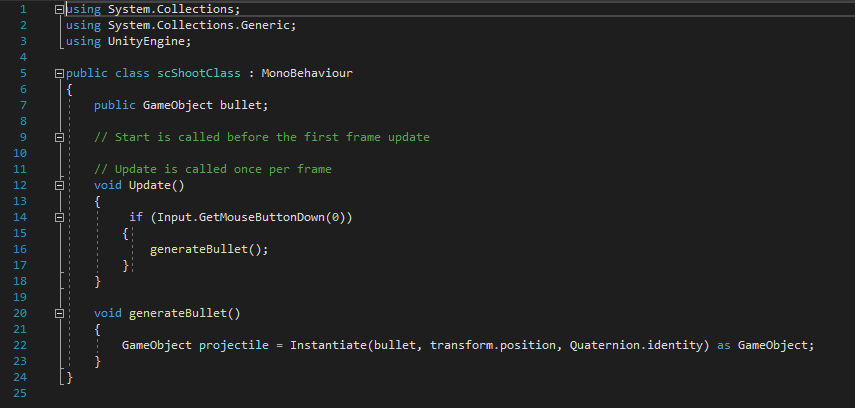
This next script was attached to the Bullet location child object, attached to the player prefab. This calls upon a new game object to be instantiated, in this case it is the projectile. This only occurs if the left mouse button is clicked however as it is controlled by an if statement on line 14. i made sure it GetMouseButtonDown rather than just simply GetMouseButton as this would allow the player to hold down Lmb and make the game far too easy.
Now that I had finished the way the player interacts with the game. It was now time to create the enemies for the player to face.
For simplicities sake, and to potentially ease any problems whilst debugging, I separated the scripts into different parts controlling the movement, collision and spawn conditions.
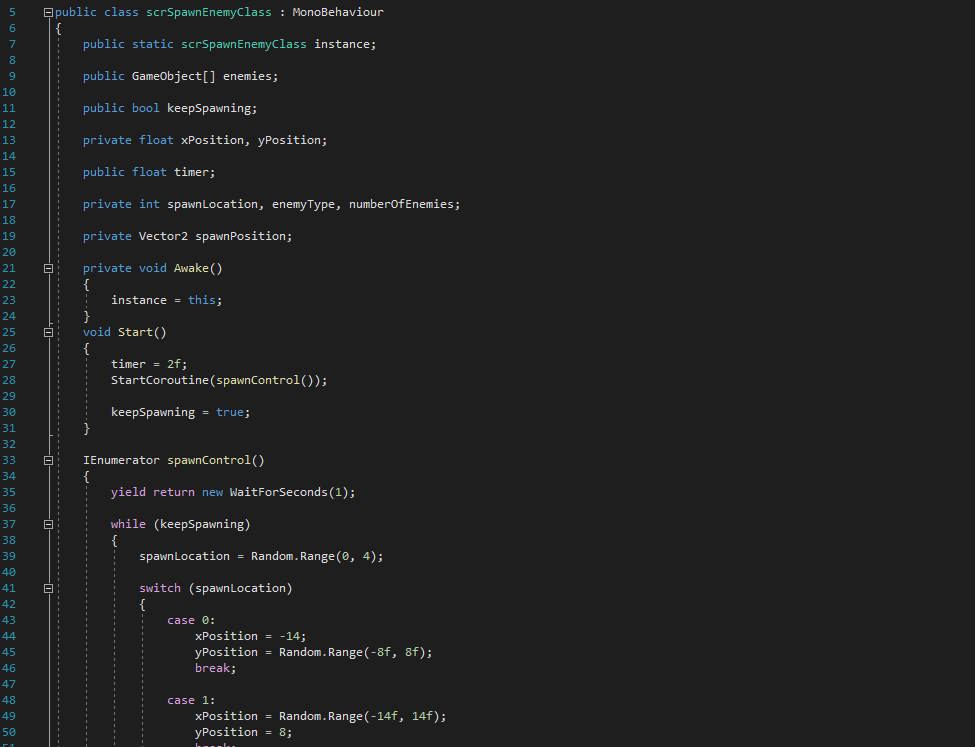
At the start of this code i create 3 different types of variable: A Bool (which is either true or false) to control when the enemies are allowed to spawn, A Float to control the timer as well as the coordinates the enemies can spawn on and an Integer which controls where enemies spawn, what type of enemy they are and how many spawn. as soon as the program is run, this script starts and sets the Bool to true, meaning from here on out the code beneath line 37 will be run infinitely until the bool is turned to false again. Upon start a coroutine is started which adds a delay between whine the while loop can run, ensuring lost of enemies don’t spawn suddenly all at once.
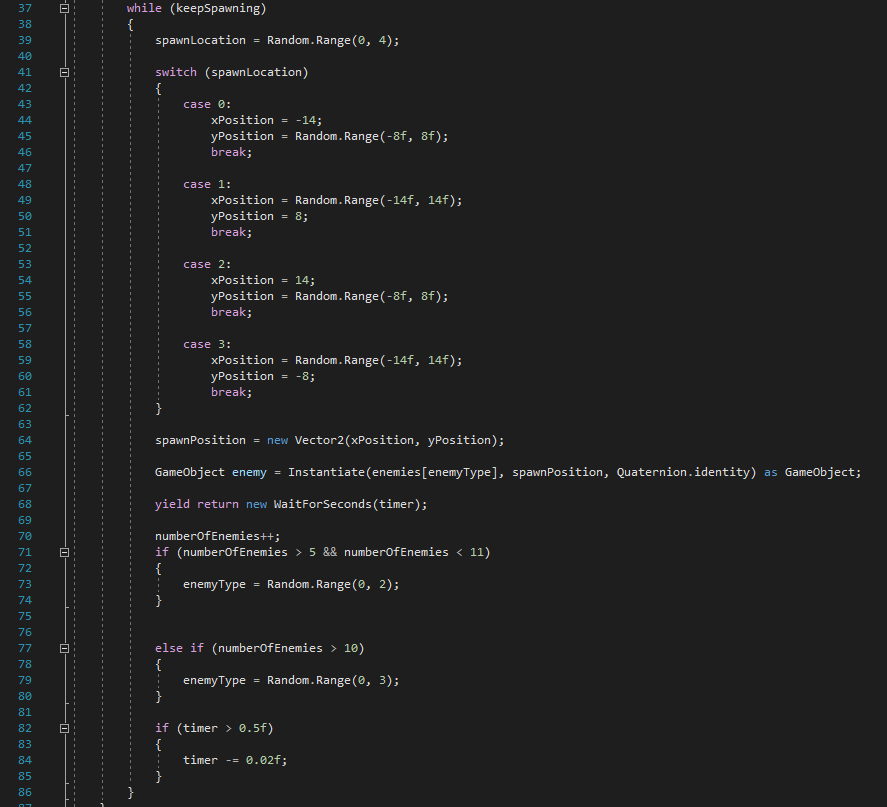
Meanwhile the code between 41 and 61 starts a case basis in which enemies can be spawned anywhere between the coordinates within a randomly selected case. This allows enemies to be spawned beyond camera view so they don’t look to the player as if they simply popped into the scene. once a case has been selected, they will spawn thanks to the code between lines 63 to 68 via Using a Vector2 to change the transform when instantiating a new game object.
Finally the code below randomises which type of enemy to spawn and adjusts the timer.
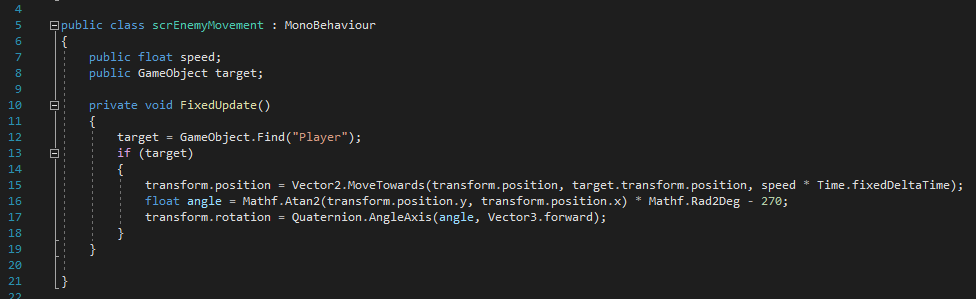
This next script sets a target to find a game object ,”Player” which of course is the player character. if the script can find “Player” (essentially if an object called player is within the scene) it will use a vector2 to change the transform component by altering the X,Y position values to go to the players current position. It doesn’t do this immediately however thanks to the speed value I set earlier. Finally I once again retooled the rotation code from the scrAimClass so that the enemies rotation would always be facing towards the player character. (However whilst this did work. it sometimes doesn’t work correctly and will rotate the sprite further than intended.)
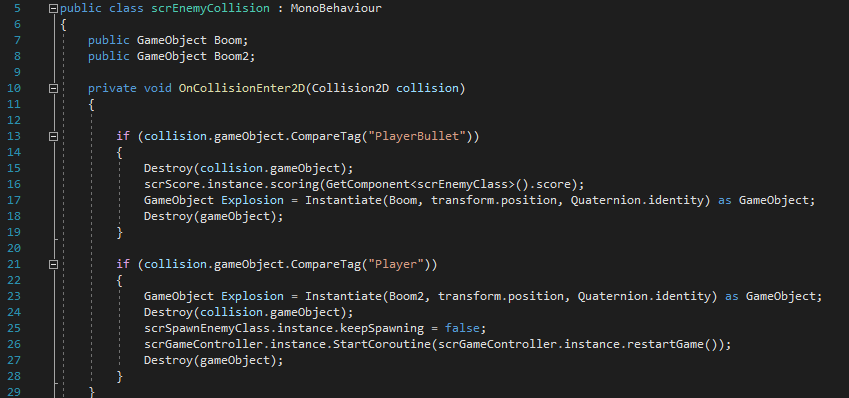
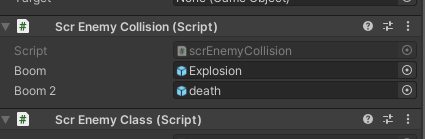
This script was used to destroy the object if collided with either the player or a bullet as well as destroy the object it collided with. Also in the case of colliding with the player, the code would also set the Bool from earlier to false, stopping enemy spawning.
All of these scripts (bar scrEnemyClass) were added onto my enemy prefabs and any public variables such as speed were given different values
For this to be achieve however I needed to add tags to both my player and projectile. This was simple enough to do as I simply needed to click on a drop down menu and add a new tag named Player and PlayerBullet to my Player and Projectile prefabs respectively.
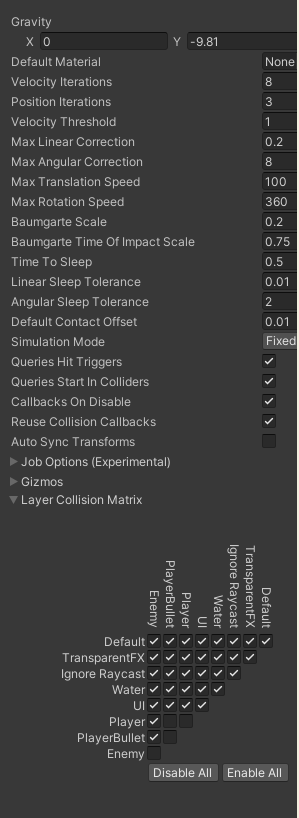
Following this I then needed to head into my project settings and make sure that objects that shouldn’t be able to collide (such as the player and the bullet) can’t this was done by unticking boxes within the collision pyramid.
At this point I had a working player, shooting mechanism and enemies all with the correct collision. However after recalling my stimulus it occurred to me needed a reason to continue playing, therefore I begun work on a scoring system the score would be displayed in an editable textbox situated on my UI.
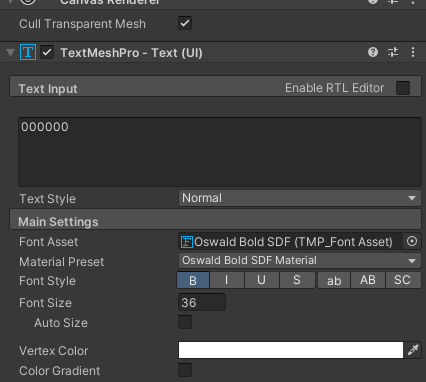
I began by creating a canvas to house my UI elements following this i created a textbox which I then input a series of six 0’s to display my increasing score.
I then began working on a series of scripts to add this mechanic into my project.
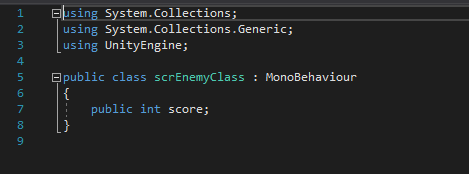
This is a simple script I attached to my enemy prefabs to give them a public integer I could use to give them varied score value.
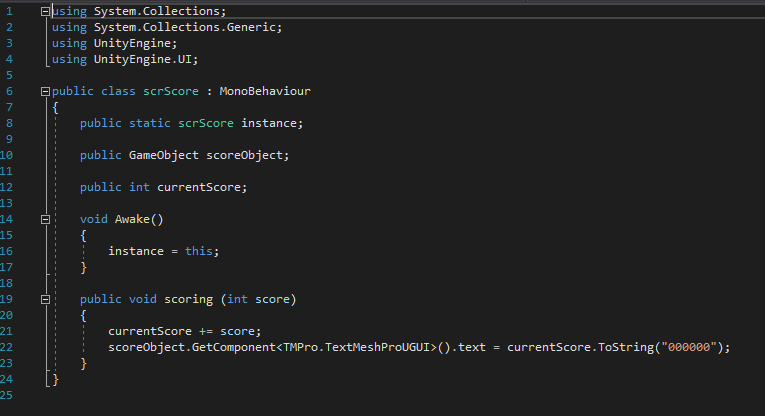
This script imports UI control (Line 4) and sets a new instance for itself when the object this code is bound to is active. Furthermore it adds the integer variable score onto itself to increase itself whilst also binding itself to the TMP asset that reads 000000 which I had set earlier.
I bound this part of the code onto an empty object I named game controller in my hierarchy. I then dragged the score button into the public GameObject box so that it would be effected by my code.
That empty object was also where I added the scrEnemyClass Script, that way it is always active whilst the game is running unless told not to.
Finishing Touches
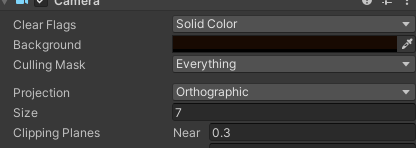
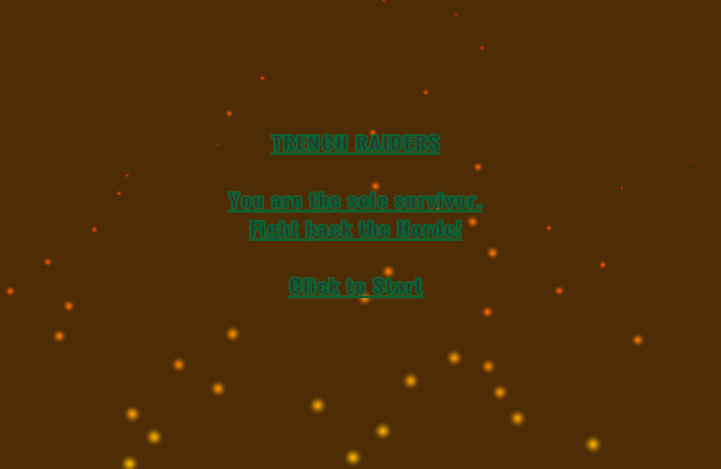
I started By changing my camera settings to a brown background similar to the mud of the trenches during WW1:
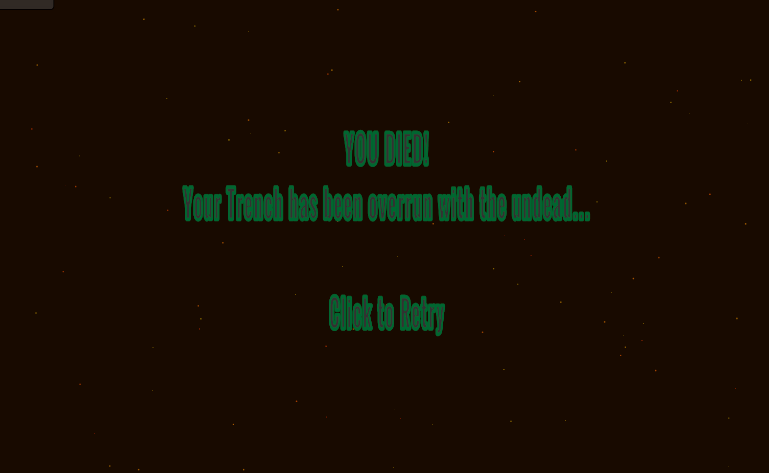
Following my mechanics being polished off and adjusting the collision circles around my sprites to fit snugly. I began to work on a main menu as well as death screens for this project.

This was done by creating a new scene called main menu in which all was held in a canvas that was comprised of a one button. i made this by Typing out the text in the child’s components of the button and reducing to colour of the button to be transparent. I then created a new script:
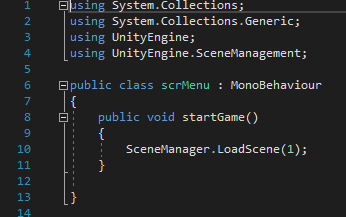
Here I imported the Scene Manager (Line4) which would then load scene 1 (my main game) a similar method and script was used for the retry screen.

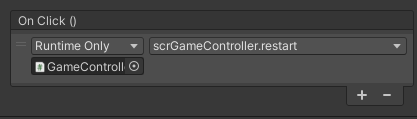
On the retry screen however, it also needed to activate the button which was previously set to inactive.
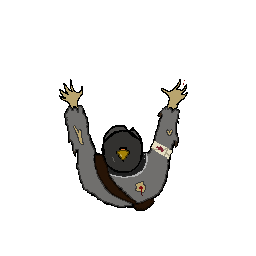
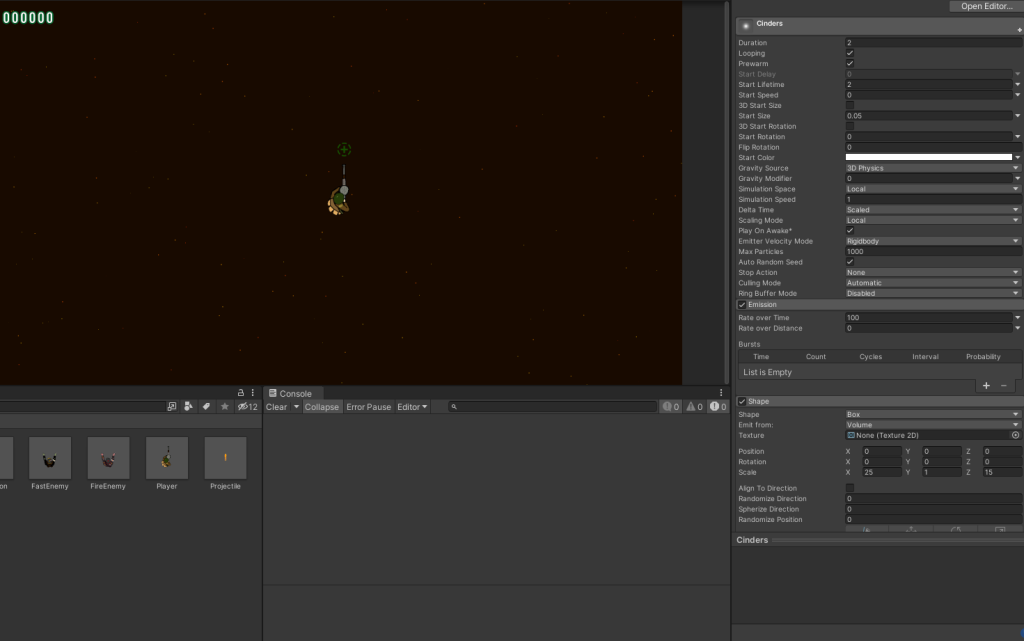
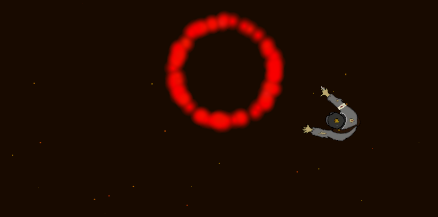
I also experimented with some particle effects:
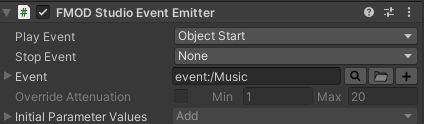
Finally i also implemented Fmod into my Game via the package manager. I once again removed the unity listener and replaced it with the Fmod Listeb and added a small script onto the player that would play a footstep sound effect as the player moved:

Conclusion
Whilst this project was certainly the most expansive and time consuming yet, I also feel that this was my most successful project yet and I believe I creatively retooled assets and scripts to serve other purposes within my scene. Surprisingly, this was also the project in which I had the least amount of roadblocks stopping me from successfully completing my project. this could be due in part to my knowledge of the Unity editor expanding along side the fact I’m continuing to familiarise myself to the editor.
However I did want to create an enemy that also shot projectiles by reworking the script used for the enemy spawning as well as the projectile script. however I was unable to succeed in making this work within my time constraints.

The Project is playable here:
https://anonamigo.itch.io/trench-defender