Concept Stage
Our second assignment was to create a prototype based around the classic arcade title: Space Invaders. To create this I would need 3 primary assets: The Player Character who can move along a set axis as attack, An Enemy to move toward the Character and be able to be damaged, and finally a projectile to link the interactions between the two.
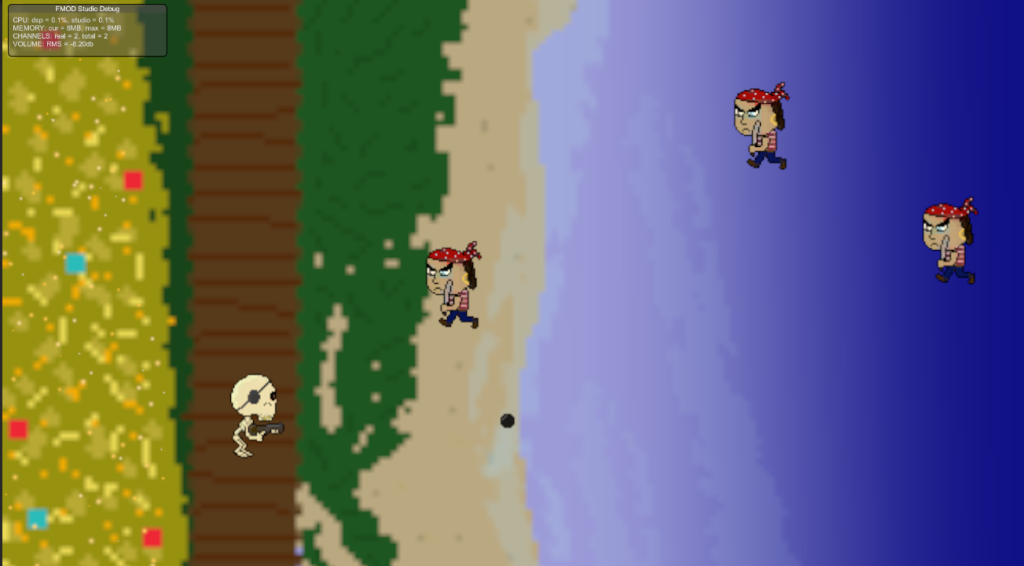
Typically, in a space invaders styled game, the character can move along the x axis and can fire upwards towards enemies dropping down from the top of the screen. However for my game to stand out not only would i need a unique theme other than interstellar battle ships and aliens. i would also require a twist on the formula to engage with the player and give my game reason to exist. Therefore i had the idea to physically put a “twist” on the gameplay by rotating the axis the game is played on by 90 degrees. this way the character would move along the Y axis rather than the X, and the enemies would attack from the side of the screen rather than the top.
in the end I went for a pirate theme as with all space invader games, you the player are playing a defensive role against the offensive enemies. therefore I gave my prototype a pirate theme in which the player defends their pile of gold from a hoard of pirates.
Design Stage
Before I began my project, it was important that I begun to create some assets for my game so it would have some appropriate visuals to go alongside my theme.
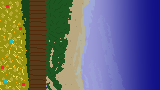
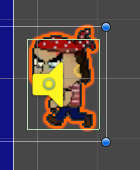
I created sprites for the player, projectile and enemies alongside a background for the games setting.


Implementation
I created my project in a 2D Core template in Unity version 2022.1.7f1, as is the standard for all my prototypes and begun my project by separating my scene and game views for debug purposes and begun my file structuring as to bring a more cohesive structure to my project whilst creating it as this was a problem for me during my cookie clicker prototype.
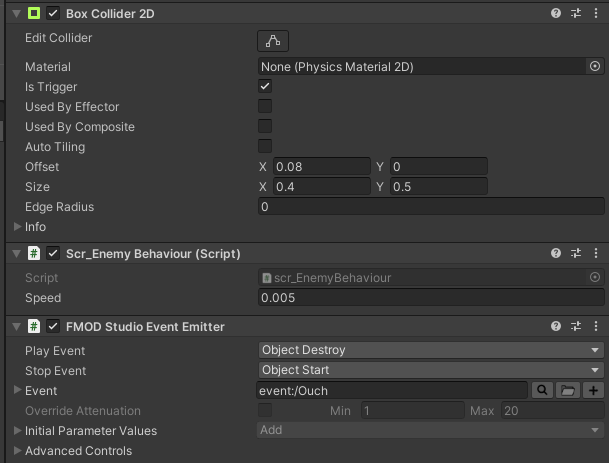
I created 3 additional folders those being Sprites, scripts and prefabs. Since i would be using multiple projectiles and enemies in this game, all of which needed to have identical properties, i decided to utilise prefabs in my work to smooth out the development process. Prefabs copy the identity and characteristics of a game object and allow all components of the object to be edited from the prefab, this was useful later on whilst i was tweaking the enemies speed. by dragging the object into the prefab folder. it created a prefab copy of the object which could be placed and edited without needing to make the same edits to the components of every instance of the object. only that of the original prefab. it works very similarly to inheritance in object oriented programming.
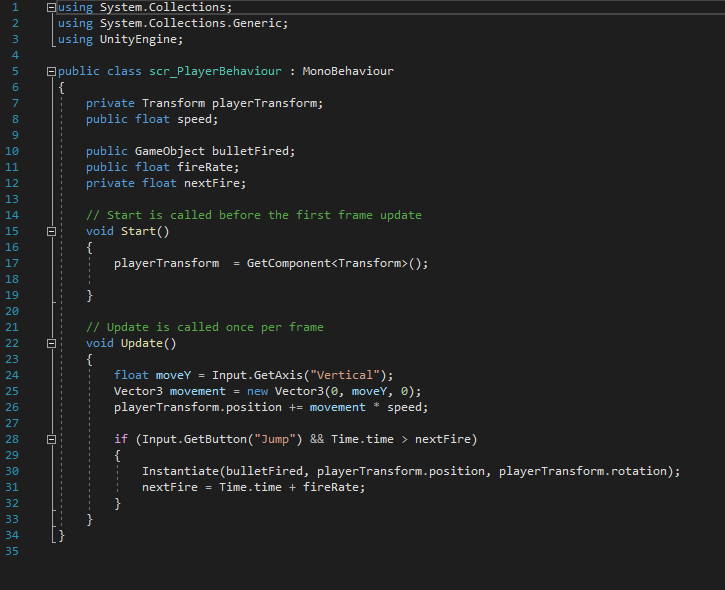
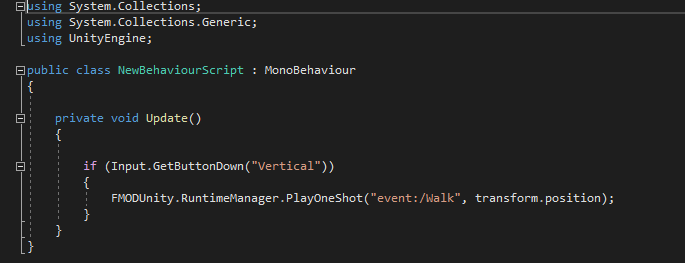
After I dragged my player sprite into the scene window, i created a new C# script (Rmb>Create>C# Script) in my scripts folder and named it with my scr naming convention. The variables listed at the top of the image above allow my player to move and create a public variable called speed, in which I can change the value within the object inspector as it is set to public rather than private. The other variables allow the script to create a new game object and set a delay between creating the new object. “nextFire” is exclusive to this script as it is set as a private variable meaning it cannot be edited outside Visual Studio (which is the program i used to write my C# code).
The Void Start commands declares the code be ran as soon as the game is started. in this case it fetches the component “transform” which is used to edit the scale, rotation and position of an object. This was vital for creating movement for my character as the code would need to change the objects position on the Y axis. calling upon the component allows it to do so.
Void update (as the // note infers) calls the code within its {} once every frame. essentially allowing this code to be running repeatedly all throughout gameplay. The float value “moveY” will be used to change the Y value in the transform component mentioned earlier. this is done via a Vector3, which can change the values of 2 independent numbers. Since unity runs on an X,Y,Z Format a Vector3 is used so we can hardcode the values of X and Z to zero to ensure the object never moves on those axis, whilst moveY is input on the Y axis, allowing player movement when pressing any “Vertical” buttons.

Finally the if statement allows the player to instantiate the game object referenced earlier, as well as set a short delay before creating a new one. all done by pressing the space bar (“jump”).
I then attached this script upon the player object, as well as the associated sprite within the objects inspector. Here I also input the speed within the script component.

Following this I began to create the enemies, the player would attack. I created a new 2D Object and then begun work on this next script:

This, like the player script, sets a public variable for me to adjust its speed within the inspector as well as allows the asset to move left across the screen due to the code under void update. I assigned this to the enemy object and created a new prefab for the enemy in which I then similarly added its corresponding sprite.
Finally it was time to create the projectile object. once again I started by creating a new 2D object and then begun creating a new script:
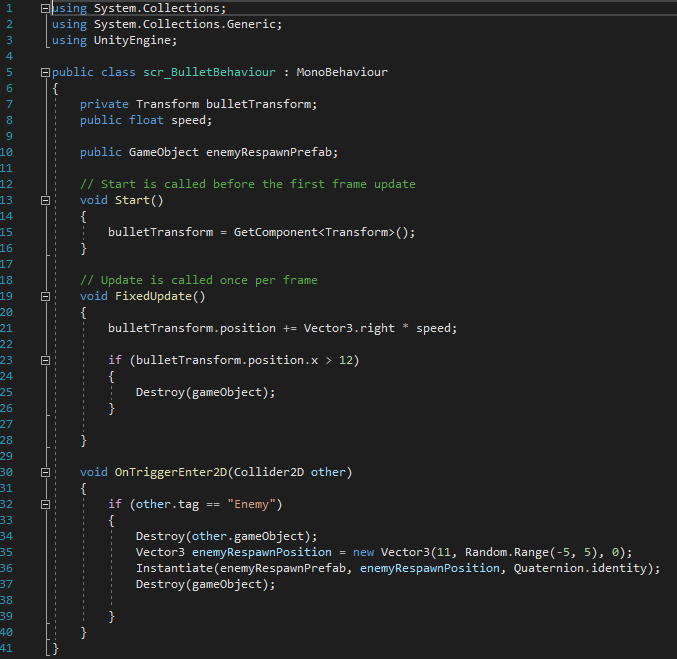
Under Fixed update, i added a small line of code that checked every frame if the object this script is attached to is beyond 12x, if so the object would be destroyed. i added this afterwards to make sure that the object does collide with any respawning enemies, as well as making sure that I wasn’t spawning an obscene amount of objects which could later impact my games performance had I played for long enough
The variables above allow me to once again control the objects movement and speed, but also create a new object. enemyRespawnPrefab. this does exactly what you would expect. On a trigger with an enemy the enemy would be destroyed and a new object would be spawned just outside of camera view (which i had changed earlier within the inspector), and anywhere along the y axis between the range of -5y to 5y (this was done by use of Random. Range). Finally after all was completed the object would then destroy itself.
This code allowed me to attack enemies with a moving projectile as well as ensure more enemies kept spawning, negating the need for multiple enemy objects to be placed within the scene.
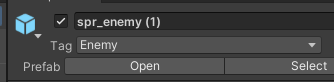
For this to work however i would need to Tag my enemy prefab as well as add some collision triggers to both my projectile and enemy.
I created the tag for the enemy within the prefabs inspector:
I also added a box collider component for both the enemy and projectile. which I later scaled respectively for QoL purposes.
Finishing Touches
Following this the main playable features of my game was completed. I then added the background I had created earlier and placed it at 1 on the z axis so it would appear behind my sprites. Apart from this i also intergrated Fmod into my game via the Package manager and deleting the Built in Unity listener, replacing it for the Fmod one. i also created a series of events for when projectile is spawned and an enemy is destroyed to play a sound effect.
Finally I also later went back and created a particle effect to be placed above the gold pile in my background to make it sparkle and shimmer. which i believe added to the theme of my game.
Conclusion
whilst I’m happy with the base mechanics of this game and enjoyed changing the perspective to work on the Y axis rather than the X which ended up challenging me when making adjustments to my code. however i wished i had added more such as an event in which the enemy reached the gold past the player, the game would end and a message could be displayed. this could’ve been achieved by using a box collider on an empty 2D object placed behind the player along the whole Y axis in which case the code from the projectile could’ve been retooled into the enemy script to play when touching the empty Object. I also would create a higher quality background in the future if I was to reattempt this project.
The project is playable here:
https://anonamigo.itch.io/gold-hoarder