Concept Stage:
When tasked to create a portfolio of several prototypes to show my proficiency within the Unity Engine as well as external programs such as Fmod and overall competency when creating a game, we was also given a basis on what these prototypes were to be built around. The first of which, an idle clicker game, similar to the like of the popular “Cookie Clicker” style games. As with all good projects, mine started with an idea. Whilst brainstorming a theme for my prototype, I wanted my game to be a way to relax and destress. I pictured calming environments and envisioned a tranquil pond, what do you find at ponds? Ducks. It just so happened that Ducky Rhymed with Cookie and thus gave my Title: DuckyClickR
With a tone and idea in mind, now was the time to think about the gameplay loop. Of course with “Idle” styled games they’re designed to be simple and not take much input on the player therefore I looked for inspiration onto how I would be able to make a rewarding gameplay loop with minimal player input. After playing a browser version of Cookie Clicker (https://orteil.dashnet.org/cookieclicker/), I knew I had found a rewarding gameplay loop. My clicking to gain points (or ducks in my case) I could then allow the player to spend those points for upgrades into their point production, such as automating point production or adding a multiplier to each click of the primary button.
Design Stage:
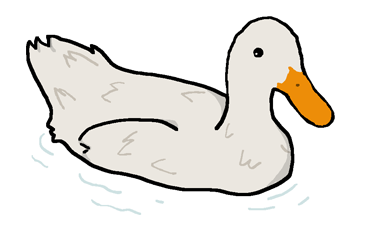
Following my initial concepts, I began to work on some design elements, such as sketching out an early interpretation of what my UI could look like; as well as using specialised software to begin making important assets such as my main button pictured here:
Moreover, this was the stage in which I set up a new Unity Project using standardised 2022.1.7f1 Version I would continue to use throughout my later prototypes. Whilst I had dabbled in Unity prior, truth be told I was much more familiar with the likes of Unreal engine over Unity, I looked forward to this endeavour though to not only broaden my horizons, but also give me a fair challenge (which it certainly did).


I set up the Project titled “Ducky_Clicker_v01” in a 2D Core template and begun work on my new prototype.
Implementation
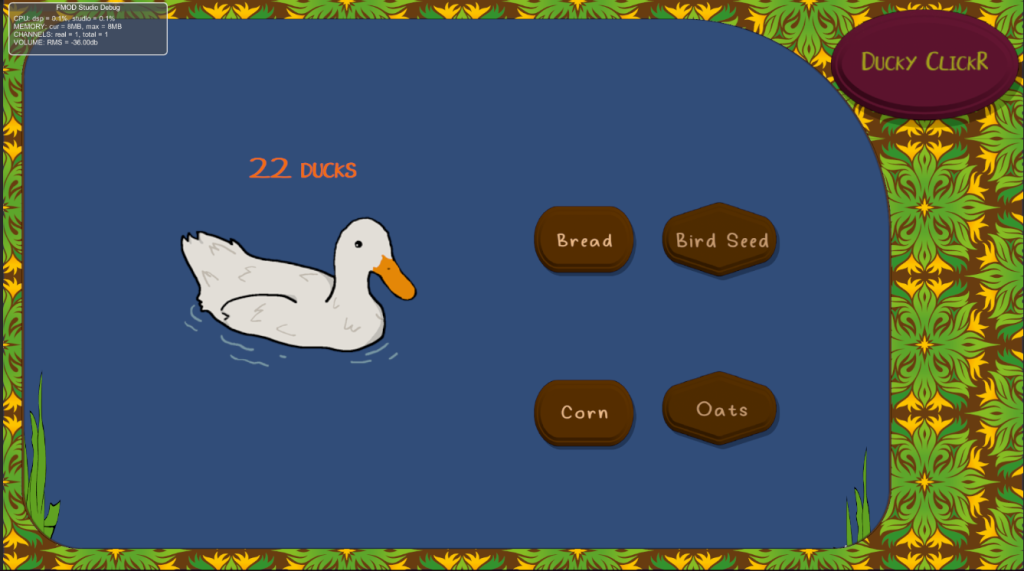
I began my prototype by setting up the project window to my liking, this included setting up folders for sprites, scenes and fonts as well as separating the scene and game views, this way I could view both my editor and how my UI would look in 1920 x 1080 (this was done by changing the game view from free aspect to 1920 x 1080 via a drop down menu) like so:
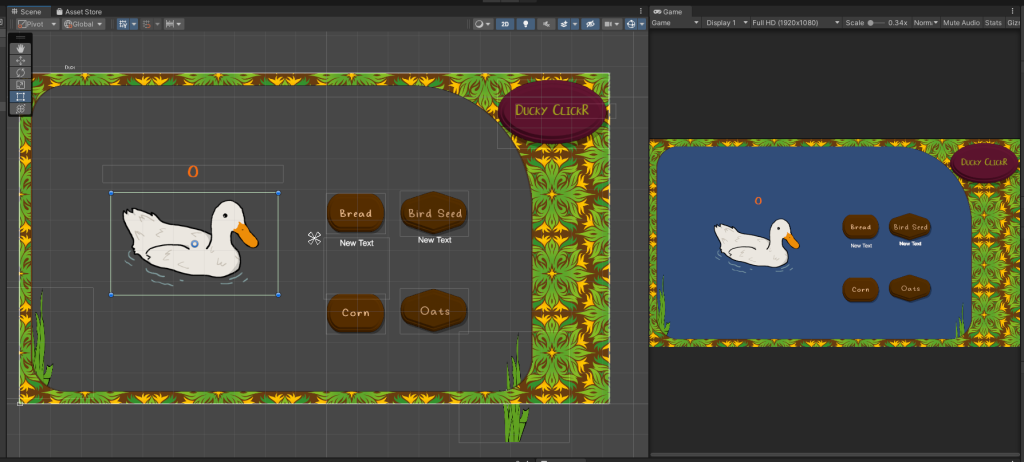
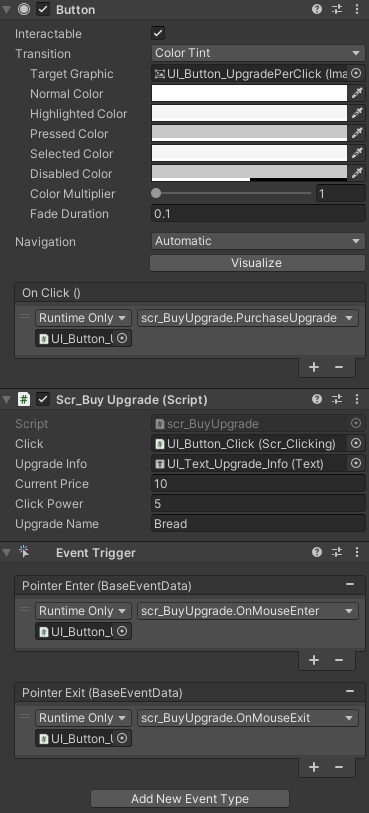
I began blocking out my UI by adding a canvas to the scene in which I then placed 3 Buttons, one as the Primary “Clicker” and two for Upgrades. These would act as the interactable with the player. Following this I then imported all outside assets like my buttons as well as a custom text font created by Seeduck on https://www.dafont.com/duck-2.font.
I subsequently created a script named “scrClicking” in the matching folder which would allow me to set the starting number of ducks collected, as well as allow me to increment them by one for every click
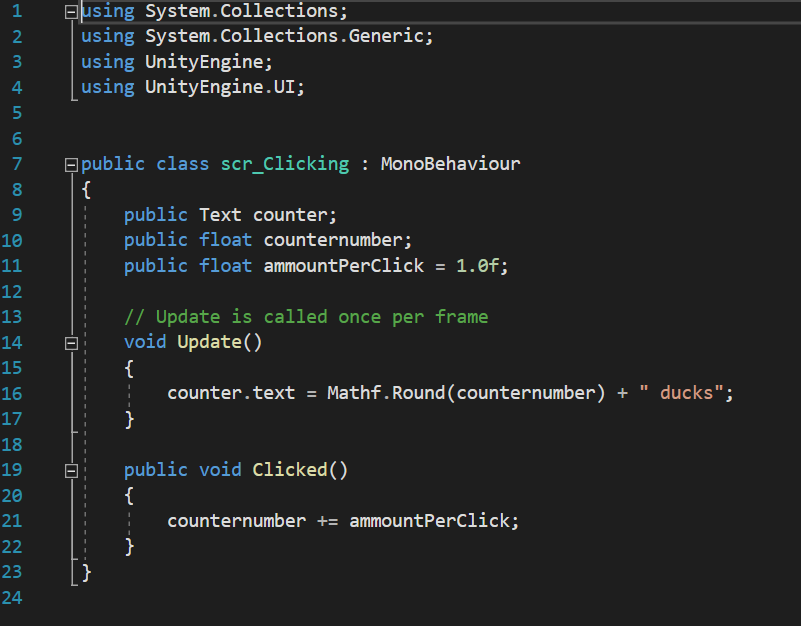
This was done by use of two variables, “counternumber” and “ammountPerClick”. These two decimal floats (which were originally Integers which I changed later for better compatibility with upgrades) allow the program to easily track and increase the count of ducks overtime. Upon reflection however I should have implemented better use of camel-case and watched my spelling as it would make my code easier to follow upon revisiting by making my variables more uniform like the naming convention in my scripts (“scr…”). the use of ” ducks” allows the code space to input the numbers as well as follow that with a string, making it clear to the player that they have x amount of points. i also believe it looks nicer from a design perspective rather than just some unlabelled number increasing. its also imperative that I imported using.UnityEngine.UI; so that it may link to the UI elements. In this case the buttons and text boxes.
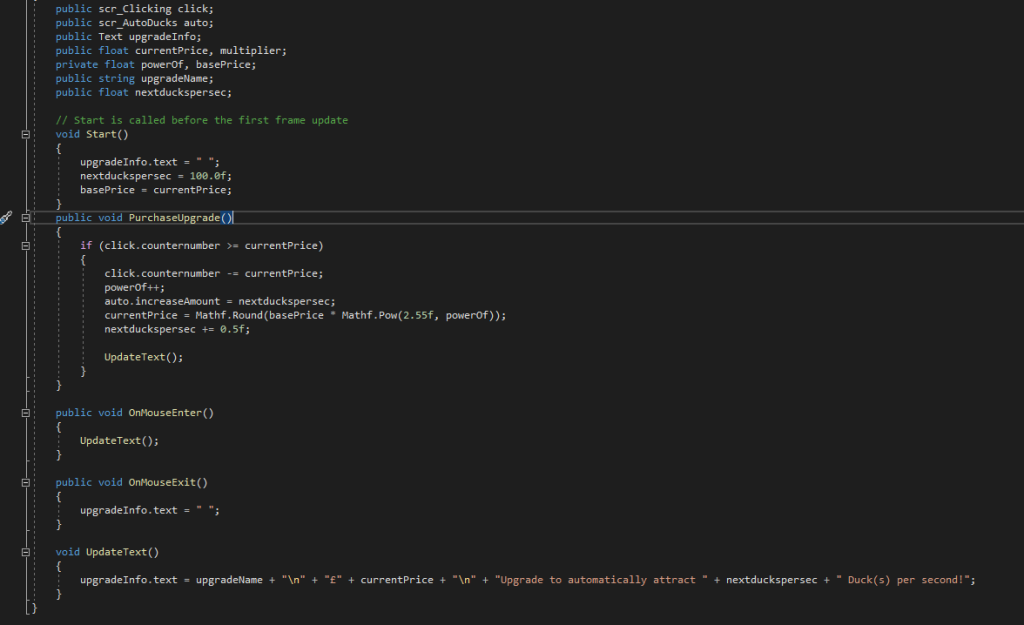
Following this I created a new script ,scrBuyUpgrade to begin work on the other buttons, namely that of the first upgrade. The purpose of this upgrade was to increase how many ducks were earned with each click. the C# code below shows how this was done.
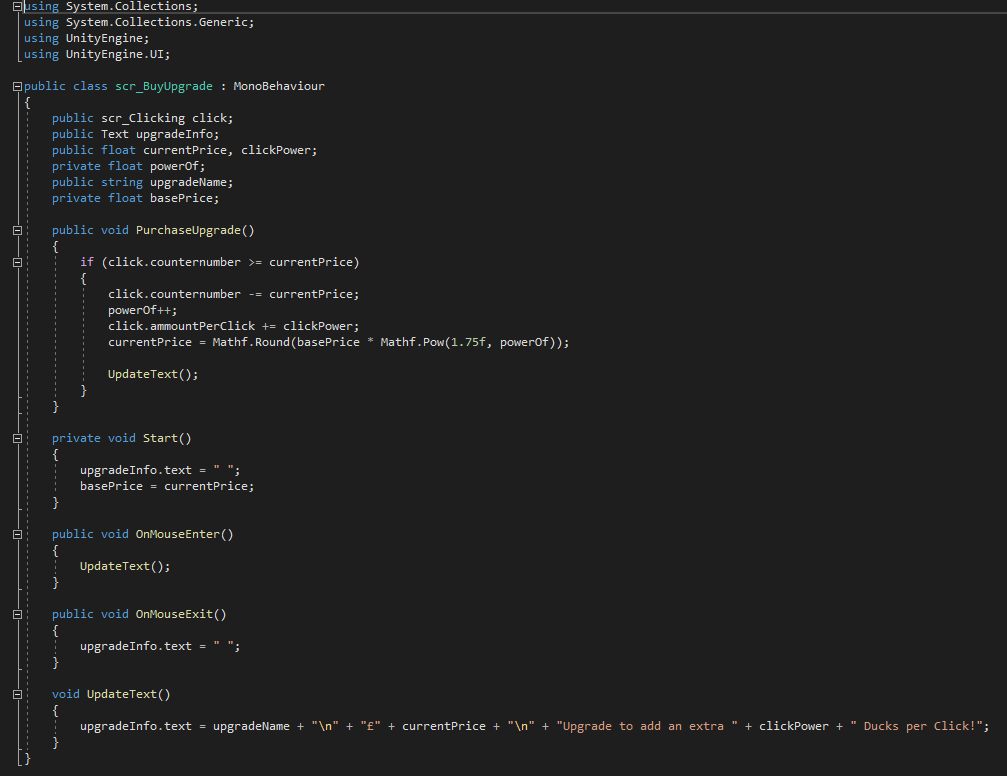
Simply put, this code subtracts a given value from your current amount of ducks if you have enough to afford it. It checks whether the current value is greater than or equal to the price of the upgrade, if so the next part of code is given clearance to happen which increases the amount you gain per click. following this it then increases its original asking price and via multiplying it by the number states and rounds it upwards.
All the Text below this allows text to appear underneath the UI element the script is bound to, which will display its current updated price.
Before creating another upgrade, I first created a new script to allow my count to increase automatically
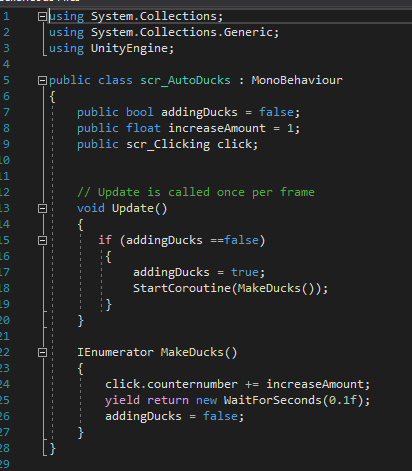
This script allows for the counter number to start increasing its duck count without player input. It first initialises itself and then starts a coroutine to make 1 duck every 0.1 seconds.

Much like the upgrade before it, this starts by comparing the count of ducks to its own value. If it is greater, it automatically increases the duck count by its assigned value, before then increasing its price but also the amount of ducks you gain per second. which is done in the “nextduckpersec += 0.25f” line.
the bottom half of the code also displays a message when the mouse is hovered over the object it is bound to. displaying the price and increased amount of ducks you gain. This is activated by the “OnMouseEnter” trigger
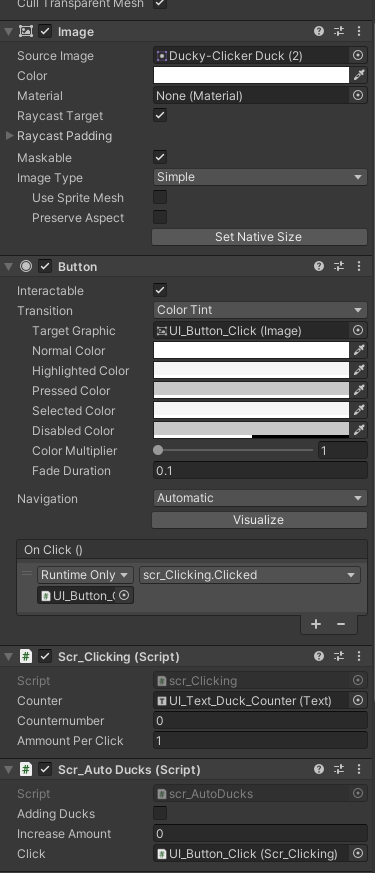
After Creating these scripts I then had to bind them to the appropriate buttons. which was simply dragging the correct scripts into the inspect editor of the button and selecting the correct variables
Finishing Touches
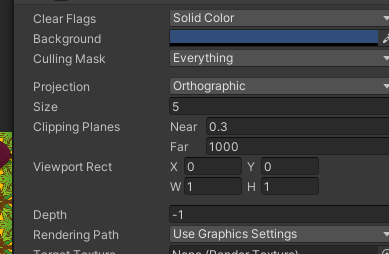
Following testing and making sure all aspects of my script were indeed working correctly, I then began to make some quality of life improvements such as changing the camera colour within the inspector to be a blue colour to imitate a pond, as well was texturing my upgrade buttons and giving them text. other UI elements like the boarder were also added onto the canvas after a small bit of trouble regarding scaling however that was eventually resolved.
I added theming such as reeds and the title of the game in the top left, alongside naming my upgrades different types of food you made feed ducks with at the park, again partaking in the theme of my project.
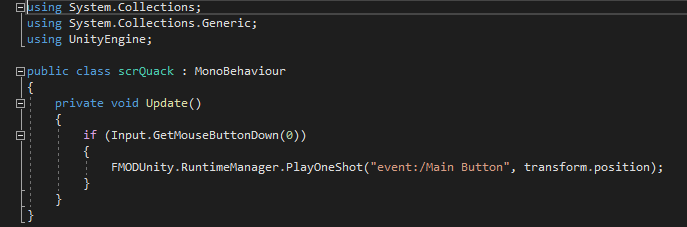
I also implemented Fmod into my scene and added a short script so that when the player clicks a Quack sound effect (Sourced from: https://freesound.org/people/DrMaysta/sounds/418509/) would play adding to the theming of the project alongside some calming music i attached to the camera via an emitter component.
Conclusion
This was a rough project for me to complete, and whilst I am proud of the result of my work I still had concepts of buttons that would move across the screen to give a big boost to your counter. there was many idea I feel as though I could’ve added however couldn’t due to time constraints and lack of technical knowledge. I particularly felt lost when I was having trouble trying to add the auto upgrade script. I definitely feel that one glaring fault in the unity editor is that it isn’t specific enough with its errors. Languages like python return what line the error is on, which is a big benefit for debugging. I feel as though a similar feature could work well within unity.
My problems didn’t end there as I was unable to figure out how to package my scene as a WebGL either as no matter what I tried I couldn’t make it run as a HTML.

Despite needing to familiarise myself with C# as well as use better coding practises, i left this project feeling proud of what I accomplished (especially the nostalgic early 2000s web game UI which I think fits nicely with my tranquil theme) and look to build upon my skills in future projects
The Project is able to be Downloaded Here:
https://anonamigo.itch.io/ducky-clickr-20